Sometimes you would like an animation to occur simply on its own — as soon as a prototype starts, or with only a timer triggering it.
Sometimes you want multiple things to happen over time, all purely time-based, without any tap triggers or the like.
We’re going to rebuild the Comments experience of Facebook Live to explore how to do this. Make sure you download the tutorial files if you want to follow along with the same material.
Setting up
If you start with the tutorial files, you should see that we have already connected our Comments Position Y to an Option Switch and Option Picker. (If you haven’t checked out the lessons on Multiple States you might not know what this means. That’s fine for this tutorial).
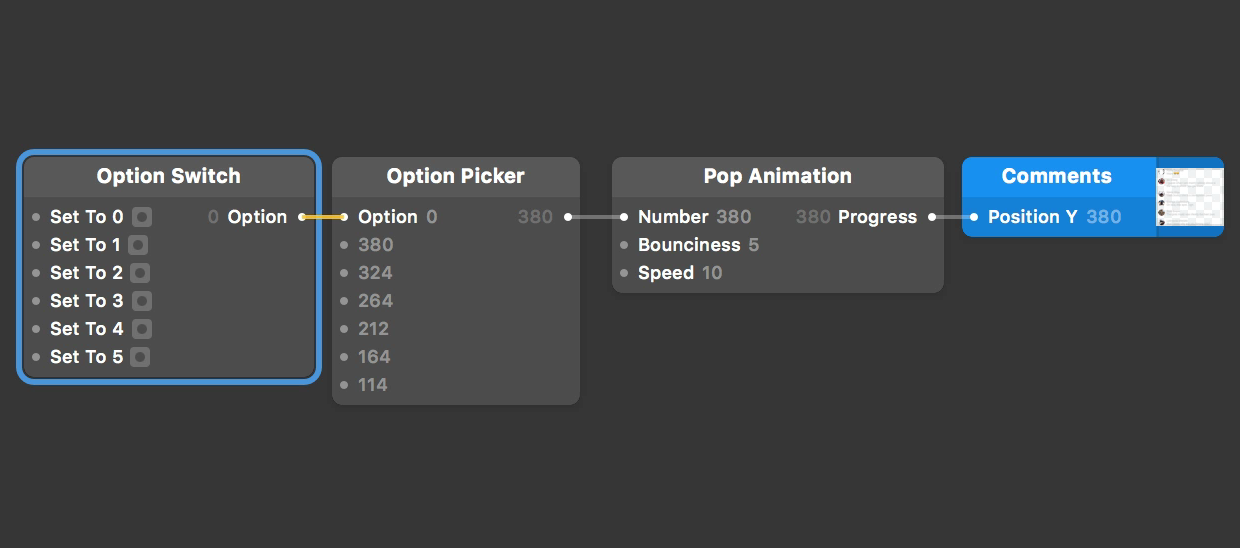
Click through each of these inputs to cause a pulse, making the Position Y of Comments move up or down. Clicking on Set To 1 will bring up our first position, Set To 2 our second, and so on.
 input to see Comments Position Y change.](/public/images/tutorials/timed-animations/option-switch.png)
When prototype starts
That first position (Set To 0) is our starting position. How can we automatically have our prototype go to next position (Set To 1) after a set time?
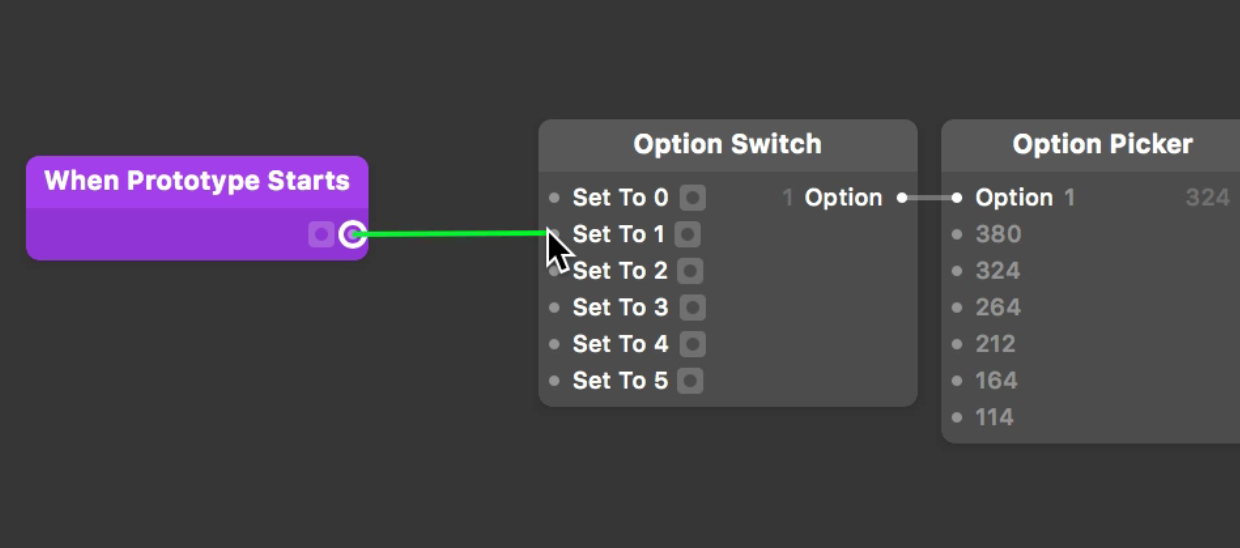
Origami has a patch for this purpose, called When Prototype Starts.
Insert one to our Patch Editor by double-clicking on the Patch Editor ⌘⏎, typing to find When Prototype Starts, then Return ⏎.
Then connect this to the Set to 1 input on the Option Switch patch.
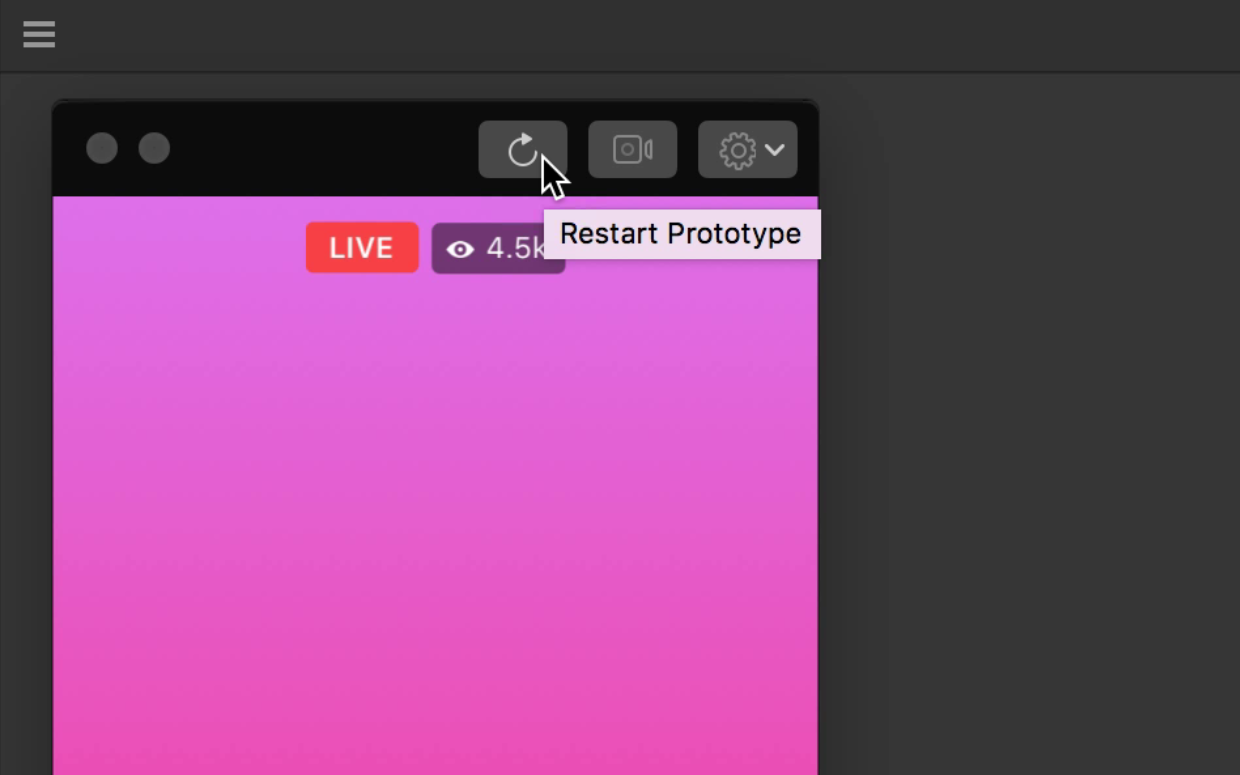
Our prototype has already started, so we won’t see the effect of this until we click the Restart Prototype button on the Viewer toolbar. Keep an eye on pulses occurring in the Patch Editor as you do this.
Wait
We are instantly going to Option 1, but what we actually want is for that option to only kick-in after the prototype starts and holds off little bit, to give a bit of breathing room. We want the prototype to Wait a second.
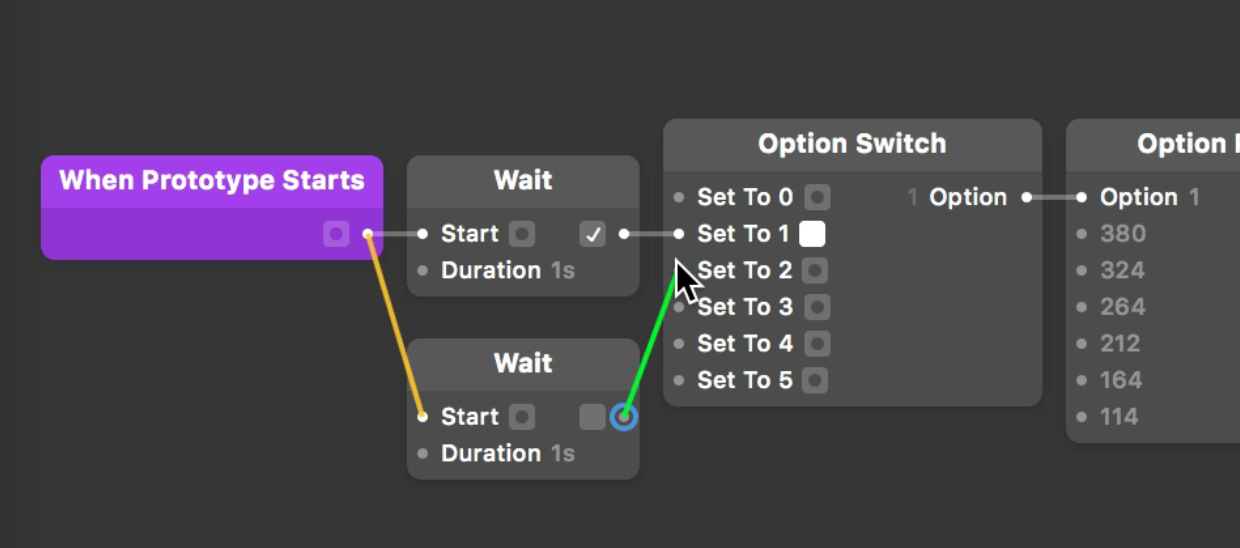
Insert a Wait patch between the When Prototype Starts and the Option Switch. Double-click on the Patch Editor ⌘⏎, type to find Wait, then Return ⏎.
Connect the When Prototype Starts output to the Start input in the Wait patch, and the output of Wait to that Set to 1 input.
 patch connects to the Set To 1 input.](/public/images/tutorials/timed-animations/wait-patch.png)
Restart our prototype now, and keep an eye on the first two patches. You should see that the signal is immediately sent, and then after one second, the signal is carried on to the Option Switch.
 passes its input to the [Option Picker](../../documentation/patches/builtin.multiplexer.html), which in turn changes the Position Y of Comments.](/public/images/tutorials/timed-animations/wait-patch-signal.png)
There are a few ways to automatically advance to the next Set To inputs, but for the sake of simplicity, we are going to add more Wait patches as our solution. These will then be connected to corresponding inputs in the Option Switch.
Add more Wait patches by double-clicking on the Patch Editor ⌘⏎, typing to find Wait, and then Return ⏎.
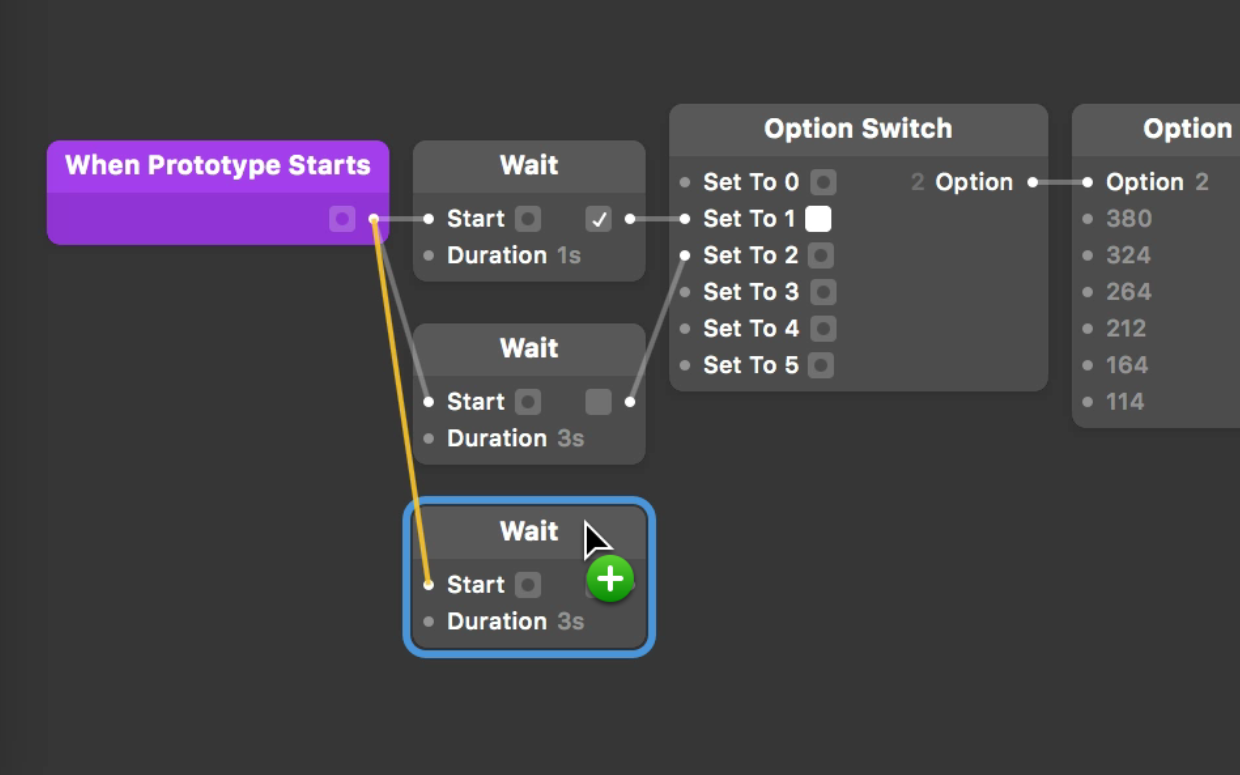
Like the first Wait patch, have the output of the When Prototype Starts go into its Start input. Have the output of this Wait patch go to the next Option Switch input, which is Set to 2.
Give the second Wait patch a duration of 3 seconds. That means that the 3 seconds is counting from when the prototype starts, not 3 seconds from when the first Wait patch is triggered.
 patch triggers instantly [When Prototype Starts](../../documentation/patches/builtin.pulseOnStart). `3` seconds later, the next one triggers.](/public/images/tutorials/timed-animations/wait-patch-second-duration.png)
3 seconds later, the next one triggers.
Multiple delays
For the sake of simplicity, keep all timing connected to When Prototype Starts.
Add enough Wait patches to cover each Option Switch input (5 in total). You can add new patches by double-clicking on the Patch Editor, or by Option-clicking ⌥ and dragging an existing one. That will create a new Wait patch, with the same input connection.
Do three more of these so we have 5 Wait patches in total.
Change the durations of each so they all trigger at a different time. The third Wait patch for example could have a Duration input of 6 seconds, second-last Wait patch 8 seconds, and the last 11 seconds.
Lastly, connect each Wait patch output to the remaining inputs on the Option Switch, in sequential order.
 patches should be ordered in shortest to longest Duration, and connected in this order to the [Option Switch](../../documentation/patches/builtin.indexSwitch.html) inputs.](/public/images/tutorials/timed-animations/wait-patch-all.png)
Like earlier, click the Restart Prototype button and keep an eye on the Wait patches as each Duration passes.
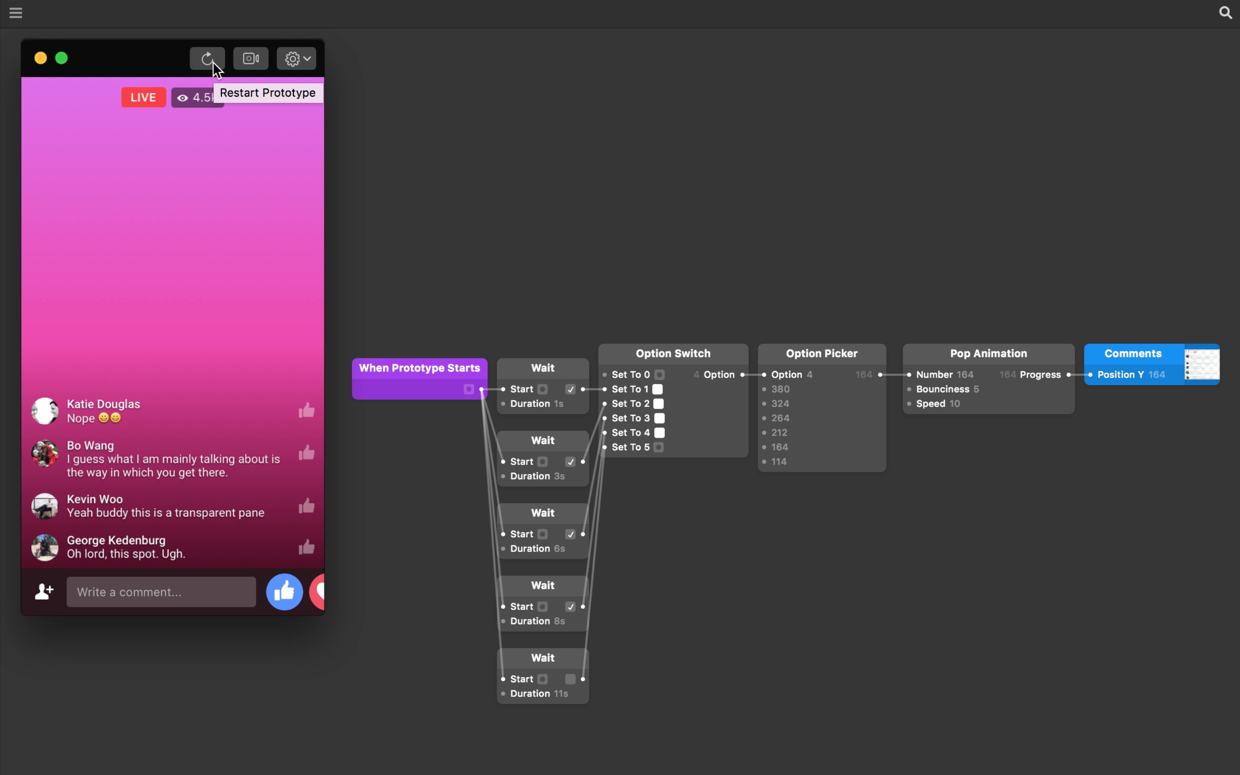
Each of these Duration values are measured from When Prototype Starts, and send their respective outputs to the Option Switch accordingly. The Option Picker takes each option and outputs a corresponding position for Comments Y.