Using loops is a great way to reduce the complexity of your prototype and save time when repeating common elements. This Facebook Notifications prototype consists of one looped notification, with an editable Profile Picture, text, timestamp and glyph. Download the tutorial files to rebuild this prototype using loops.
Manually duplicating
All layers mentioned above are already prepared in the tutorial files — for one notification only. If we wanted to make a few rows of notifications without loops, we could Copy ⌘C and Paste ⌘V the Group. This process however is laborious, and does not support easy editing and changing should any need arise later on.
Looping instead
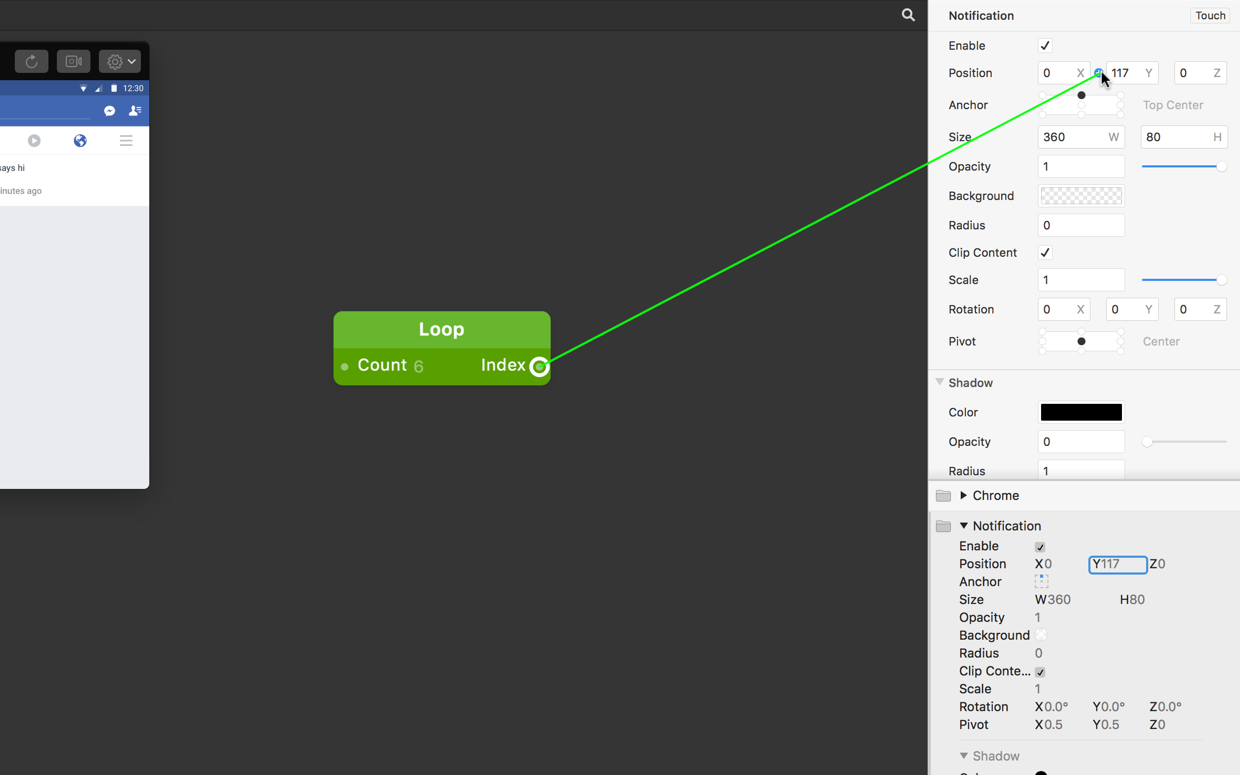
With loops we can use our one notification as an instance and repeat it. If we want to change one thing across all notifications, we can do it once, and have it reflected across each of them. To create a loop, double-click on the Patch Editor and type to find Loop. Press Return ⏎.
 patch, and not something else.](/public/images/tutorials/introduction-to-loops/loop-patch.png)
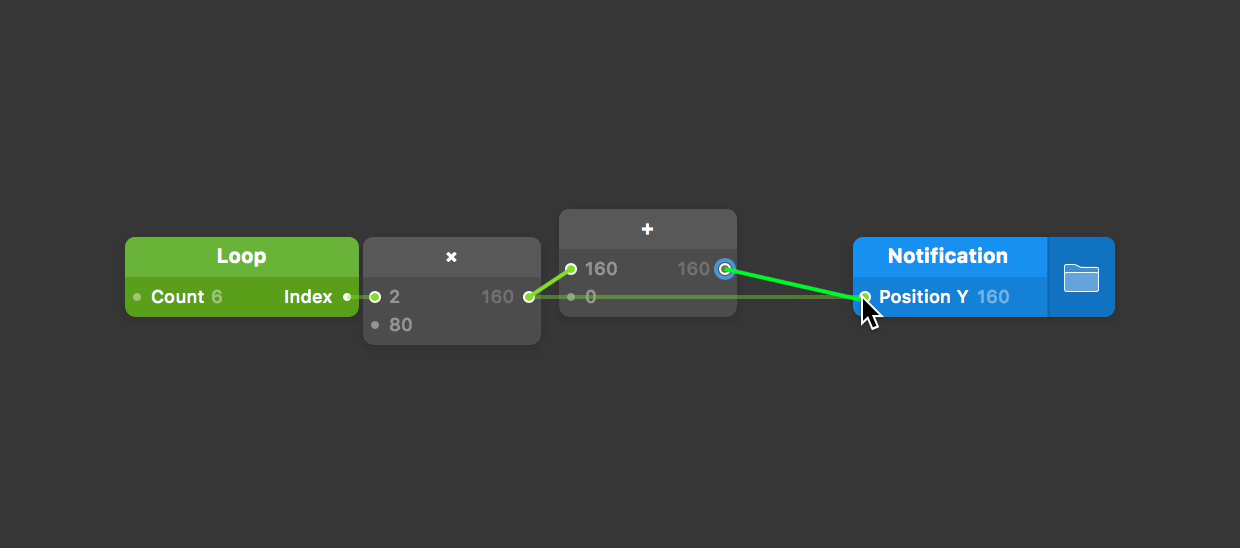
Looping a position
We know that we need 6 of these notifications, so change the Loop patch Count input to 6. We want these 6 notifications to stack up vertically, so connect the Index output of the Loop patch to the Position Y of the Notification Group.
Hiding the Chrome Group shows us the 6 instances of Notification appear to be stacked up on top of each other. They are actually positioned 1 point vertically away from each other starting a Position Y of 0. This is because the Loop patch gives us 6 values and numbers starting from 0 which are connecting directly to the Y Position of Notification.
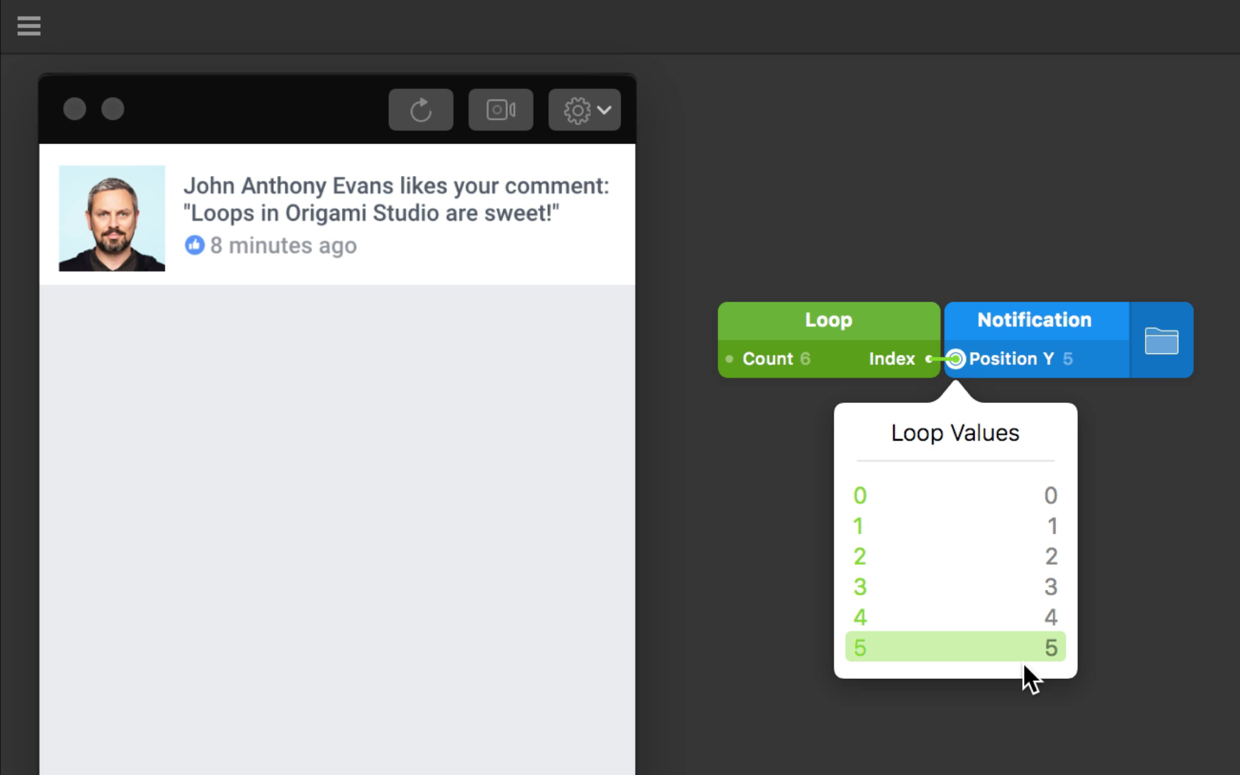
5 in the Loop Index) is 5 points down from the very top.
Adding space to a looped position
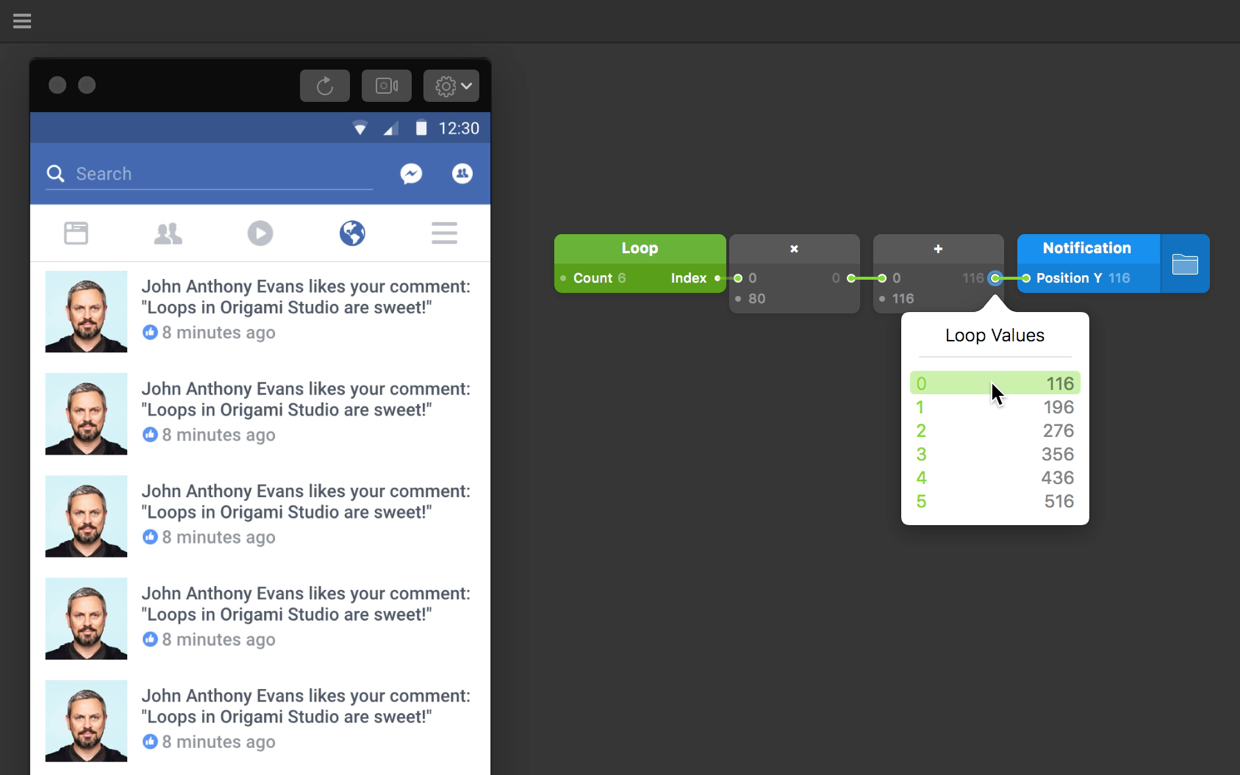
We know that each of our 6 instances of Notification has a Height value of 80. We also know that our Index values are 0 through 5. We therefore need to multiply the indexes by 80 to have them positioned 80 points vertically away from each other.
Double-click on the Patch Editor ⌘⏎ and type to find the * patch. Press Return ⏎. Connect the Loop patch Index output to one input on the * patch, and make the remaining input 80. Finally, connect the output of the * patch to the Notification Position Y Layer Property patch.
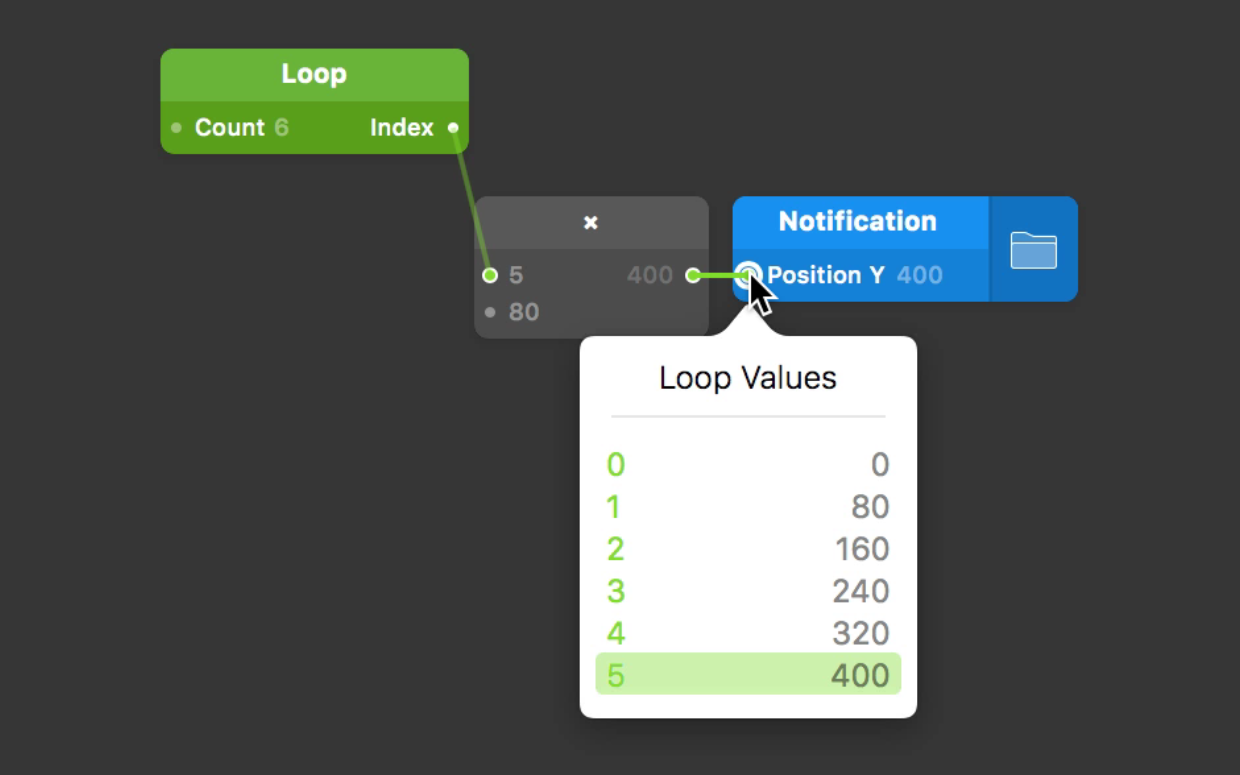
The index value multiplied by 80 will position the Notification instances vertically. Try changing the value from 80 to something higher or lower to get a better idea of how this works.
Offsetting a loop
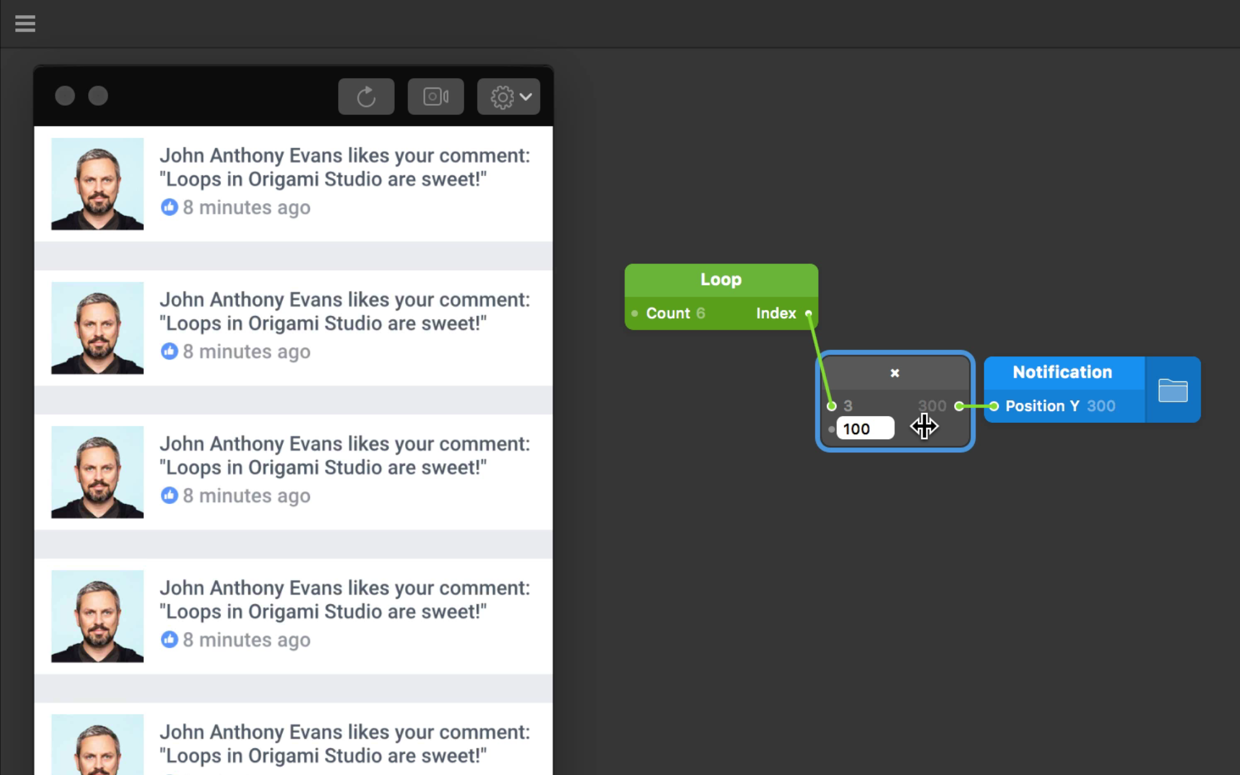
The 6 instances of Notification need to be push these down equally to sit just below the Chrome. Double-click on the Patch Editor ⌘⏎ and type to find the + patch. Press Return ⏎.
In the Patch Editor, position the + patch between the * patch and Notification Position Y Layer Property patch. Connect the output of the * patch to the topmost input of the + patch. Finally, connect the + patch output to the Notification Position Y Layer Property patch.
Re-enable the Chrome in the Layers panel. Select and scrub the second input of the + patch to find the point value where the Notification instances sit flush underneath the Chrome (try somewhere around 116).
Changing individual properties
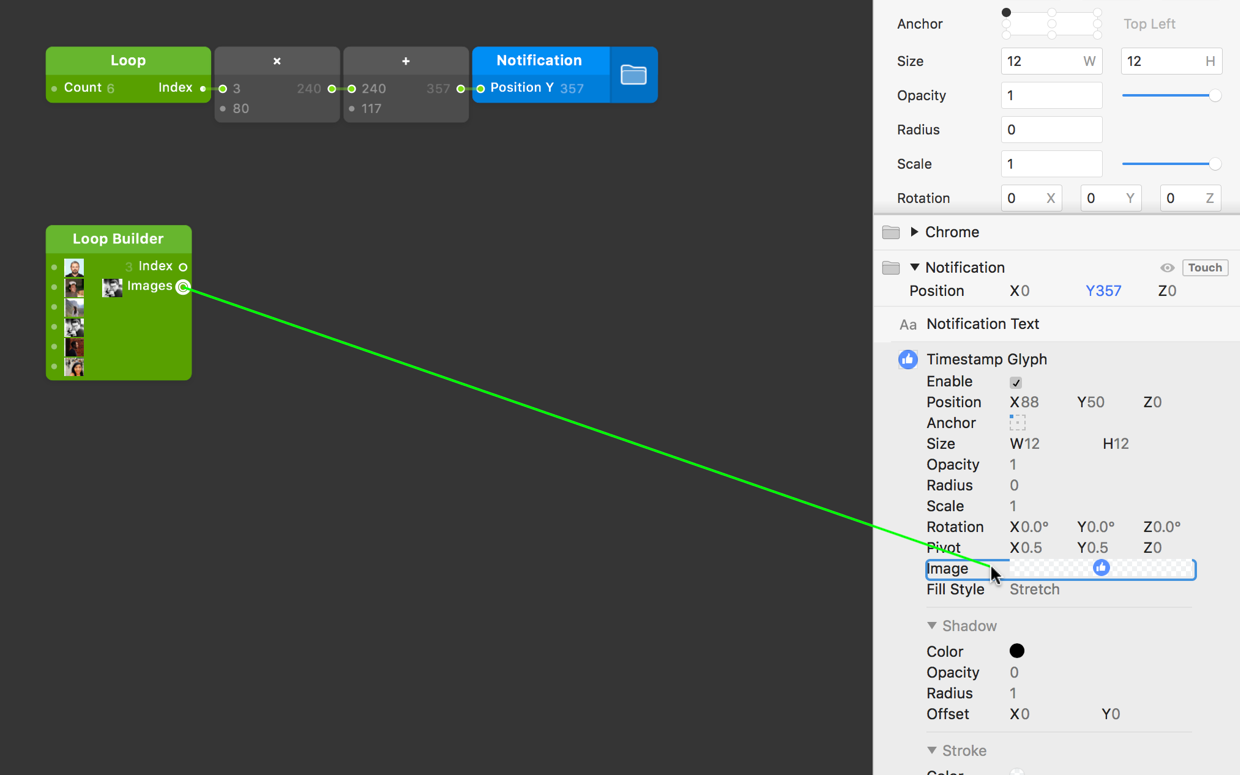
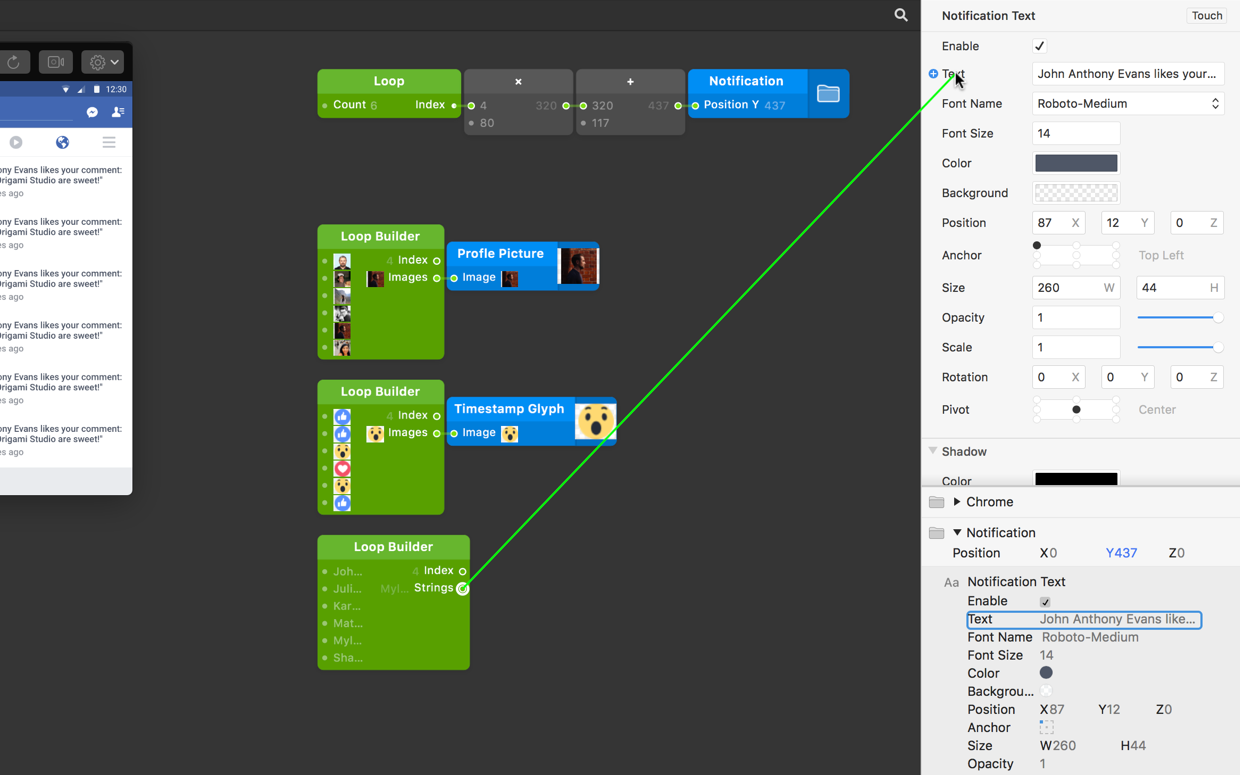
Up to now we have affected only the Position property of the Notification instances. How can we change things on each Notification instance, such as the Profile Picture Image? Within the starting tutorial files you should find a folder of Profile Picture images. Drag that folder into Origami.

Origami will take these images and create a Loop Builder patch, with all the images as inputs.
 patch.](/public/images/tutorials/introduction-to-loops/loop-builder-values.png)
Connect the Images output of the Loop Builder patch to the Profile Picture Image input in the Layers panel. Keep an eye on what happens in the Viewer as a result.
The Loop Builder patch loops through each instance of Notification and assigns an image to each, in order. We can do the same thing with Timestamp Glyph, so navigate to the starting tutorial files and drag the Icons folder into Origami.
With the resulting Loop Builder patch, connect the output to the Timestamp Glyph Image input. Notice how all the glyphs in the prototype are updated similar to how the Profile Pictures were.
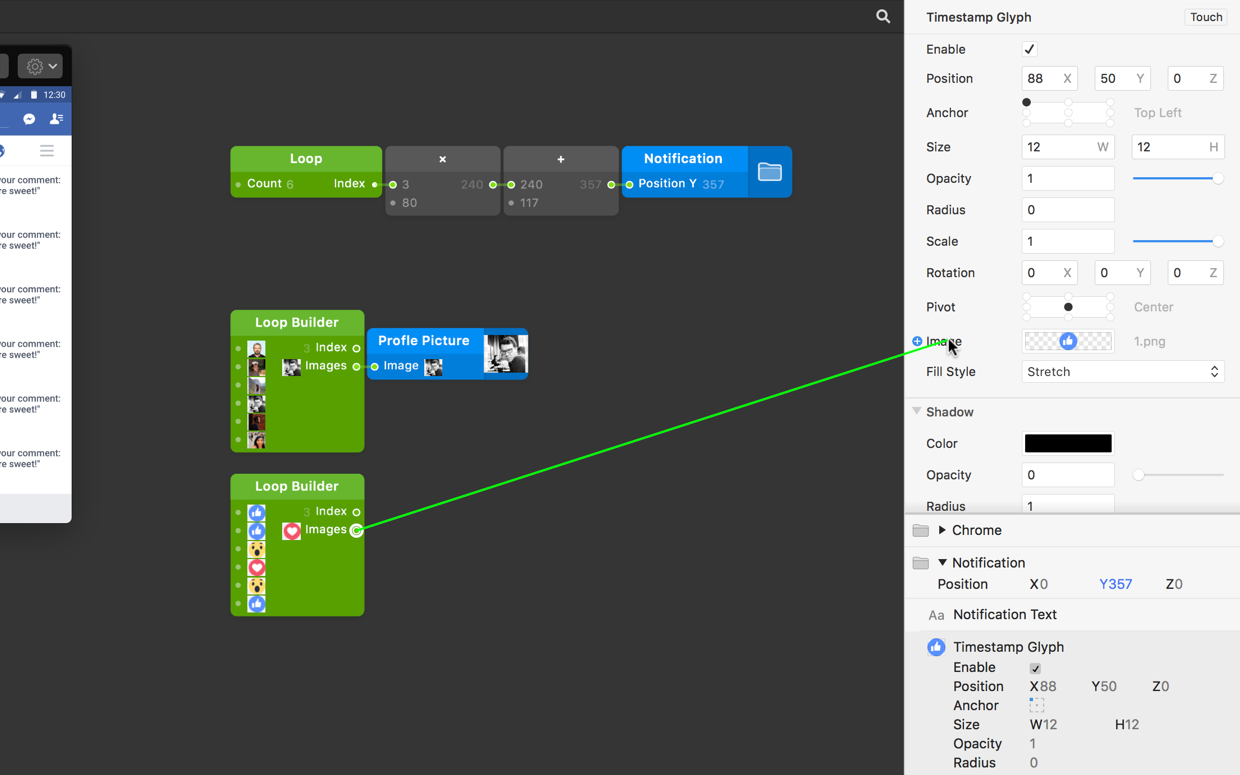
The difference between the Loop Builder and Loop patches is that the Loop Builder patch provides an index plus a type of layer as well. In this case, images.
Beyond images
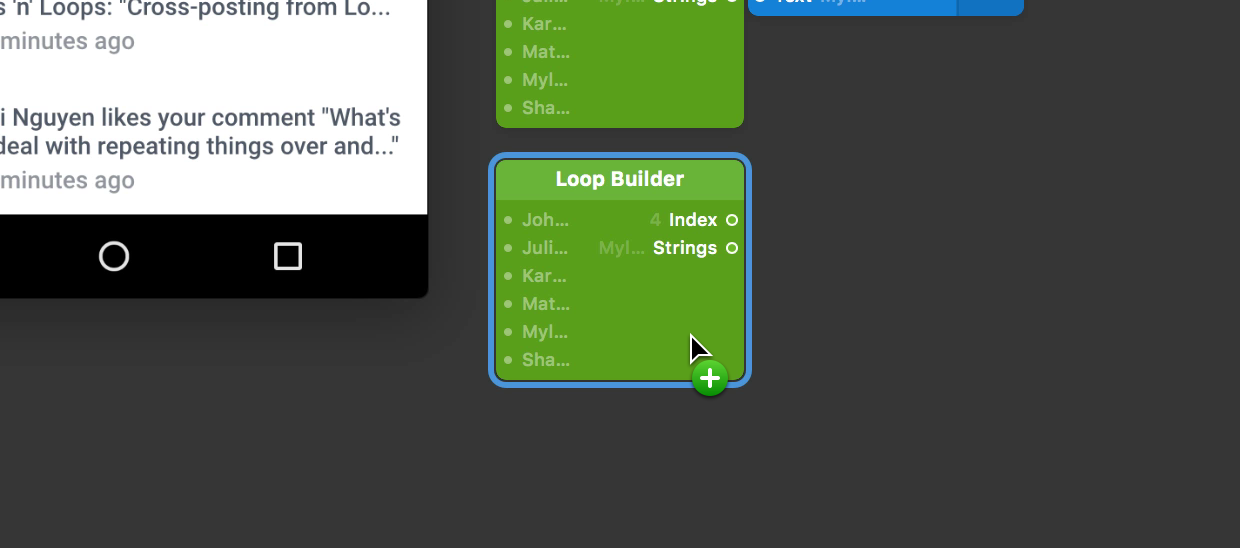
Insert a Loop Builder patch by double-clicking on the Patch Editor ⌘⏎ and typing to find Loop Builder. Press Return ⏎. Right-click on this Loop Builder patch and change the Number of Inputs to 6. Right-click again on on the Loop Builder patch again and change the Type to Text.
 patch supports a variety of input types.](/public/images/tutorials/introduction-to-loops/loop-builder-type.png)
We are going to use this new Loop Builder patch to replace the Notification Text on each instance. Feel free to populate the inputs with whatever text you would like before going onto the next step. Next, connect the the Strings output from the Loop Builder patch to the Notification Text layer Text input.
Keep an eye on the Viewer to see your changes populate the prototype with the new content. Next, instead of adding another Loop Builder patch and editing the Number of Inputs and Type, Option-click ⌥ the previous Loop Builder and drag to just below.
Change the input values of this patch to whatever you would like before proceeding. Next, connect the String output of this Loop Builder patch to the Timestamp Text input.
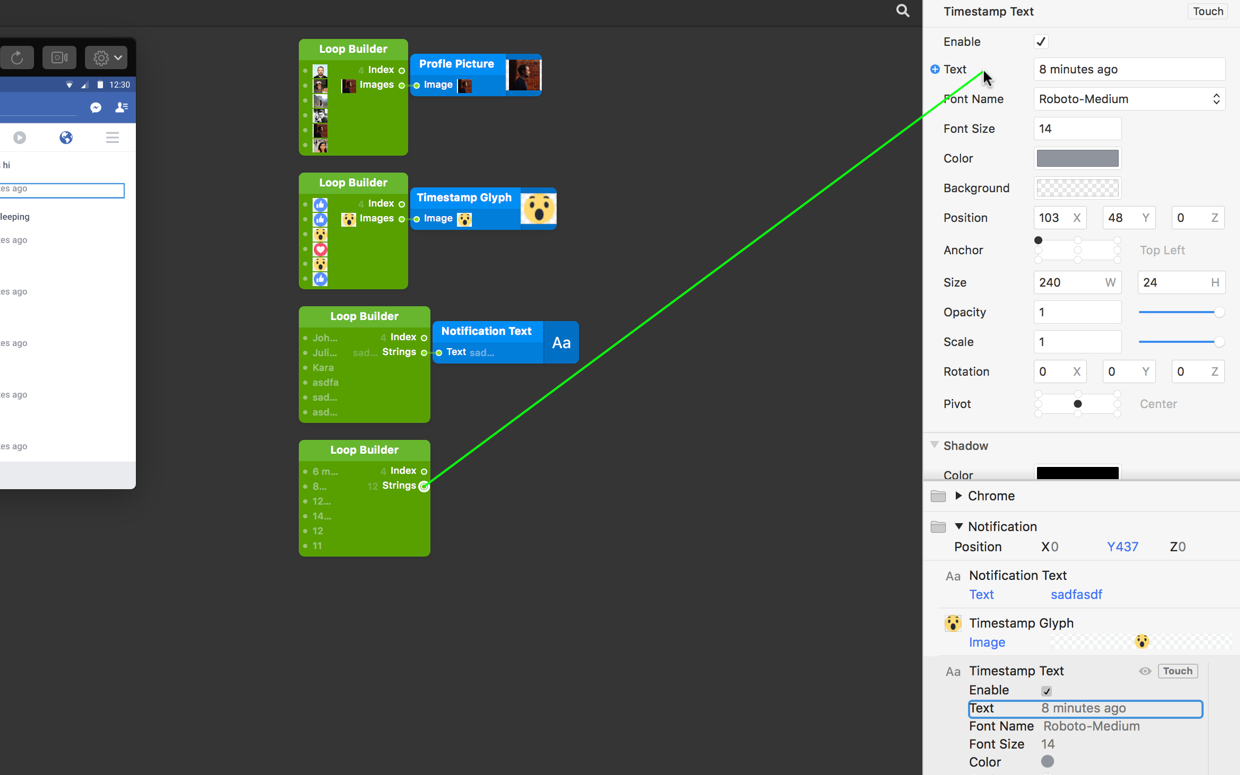
You should now have a prototype consisting of 6 different notifications. Each of these notifications contains easily-editable, looped contents.