Sometimes we want scrolling to be paginated, or in a carousel. We are going to build this Facebook Events prototype, with paginated scrolling, building upon what we’ve learnt in the Scrolling Views. Make sure you download the tutorial files to follow along.
Setting up
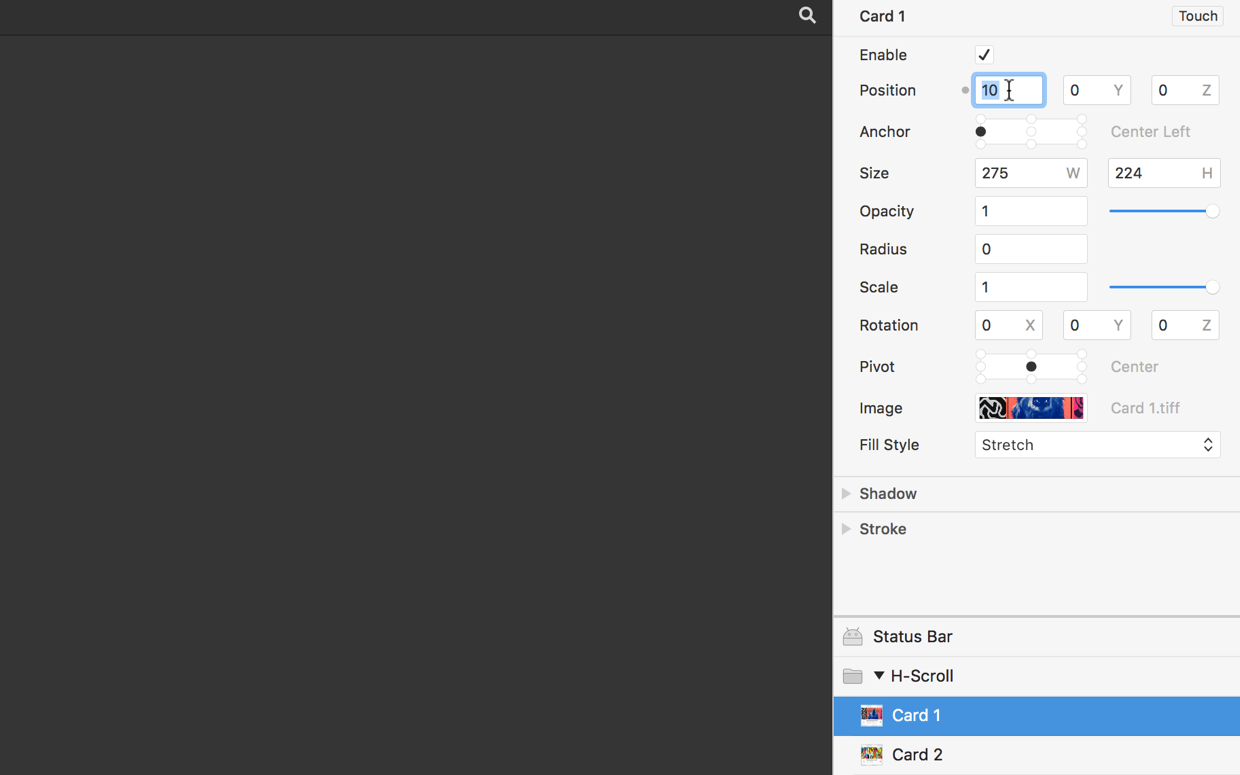
If you’re starting from the tutorial files, you should see that we have our assets in place. We have five cards for our carousel, each the same width, and each the same distance from each other at 10 points. They are placed in a Group that is the width of all the cards in line, with the usual 10 points padding at the start and end.
Adding scroll
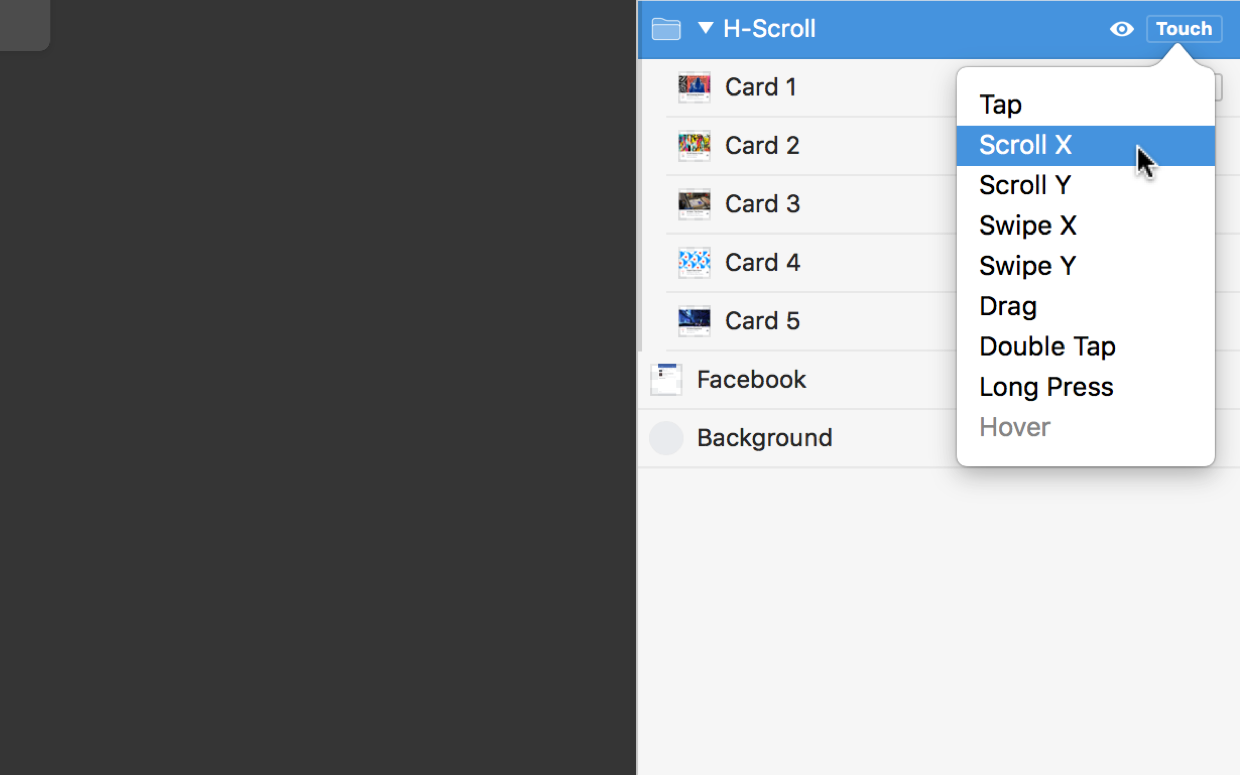
We add scroll like any other interaction — by hovering over the layer, clicking on Touch, and then clicking on a Scroll option. We want horizontal scrolling, so select Scroll X.
What we end up with on the Patch Editor is a Scroll patch, connected directly to the X position of that layer — the H-Scroll Group.
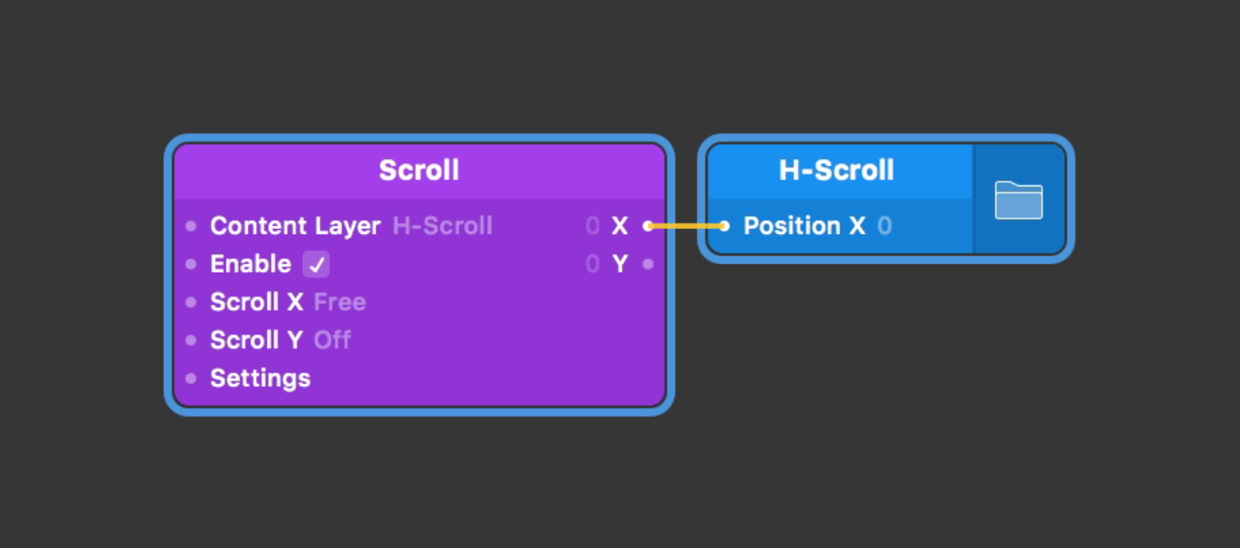
Scrolling the H-Scroll Group works fine, but it is set to Free scrolling. To make the Scroll Paging, we need to change the Scroll X input from Free to Paging.

For any full-width paging scrolling, this would be fine. But because our cards are actually smaller than the width of the screen, we need to tell the Scroll exactly how big one of these cards, or pages, is.
To give the Scroll settings, we need to add a Scroll Settings patch. Double-click on the Patch Editor ⌘⏎ and type to find Scroll Settings. Press Return ⏎.
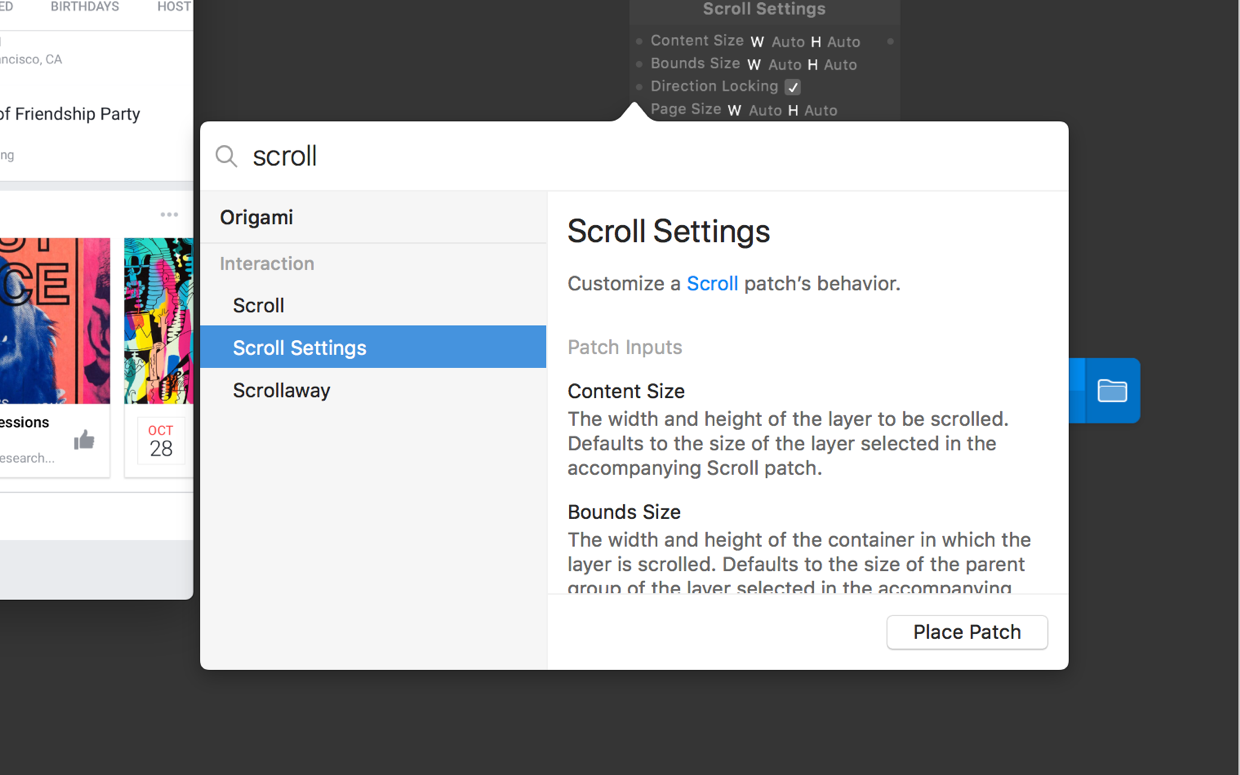
Connect the output of the Scroll Settings patch to the Settings input on the Scroll patch.
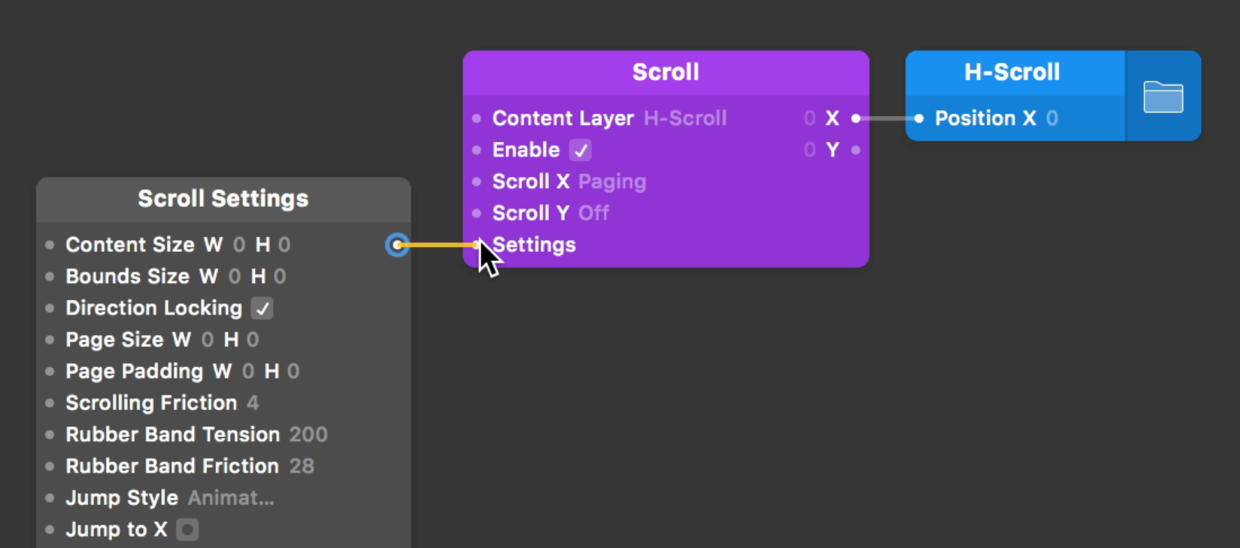
There’s a ton of settings here, and we don’t usually need to use them all. Start by changing the Page Size input to have a width of 275 — the same as an individual card.
Change the Padding to a width of 10 — the same as the padding between each of the cards. We are not changing the height from 0 because vertical scrolling is not applicable in this prototype.

Now when we Scroll, our cards take up one swipe or scroll movement. The first and last are aligned to the sides, and the middle ones are centered.
Android is a little more rigid than these animation inputs. We can change Rubber Band Tension to something like 440, and the Rubber Band Friction to 46.
 uses iOS behavior by default.](/public/images/tutorials/horizontal-scrolling/scroll-settings-inputs-animation.png)
Clipping the scroll
Scrolling in Origami has the ‘rubber banding’ effect by default. This is what you see in many use cases of scrolling, and almost everywhere in iOS. This is an Android prototype however, so we do not want this over-drag at the start and end of the Scroll.
We need to contain the Scroll to certain bounds — the Start X position and End X position. We need to use the Clip patch to contain values.
Double-click on the Patch Editor ⌘⏎ and type to find Clip. Press Return ⏎. We know our H-Scroll Position X start value is 0. Scrolling to the last card should show a value of -1075.
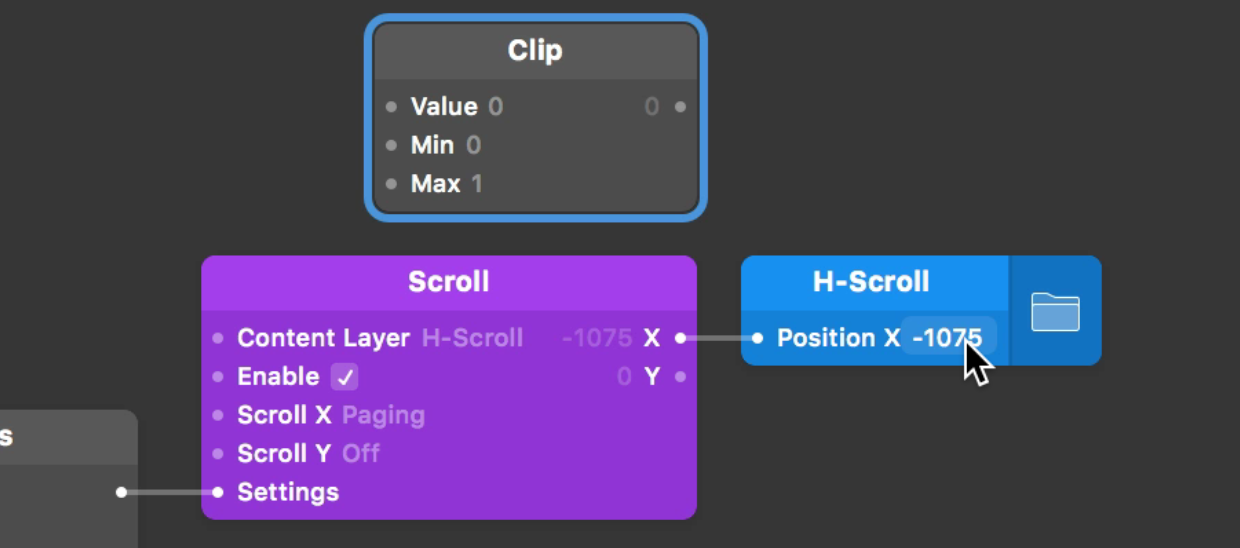
Our Clip patch Max input should be 0, since that is the larger of the values. Our last card is, again, at -1075. Because that is a negative number and therefore less that 0, make -1075 the value of the Clip Min input.
 patch with new values.](/public/images/tutorials/horizontal-scrolling/clip-min-max.png)
Connect the Scroll X output to the Clip Value input. Then connect the output of the Clip to the input of the blue H-Scroll position Layer Property Patch.
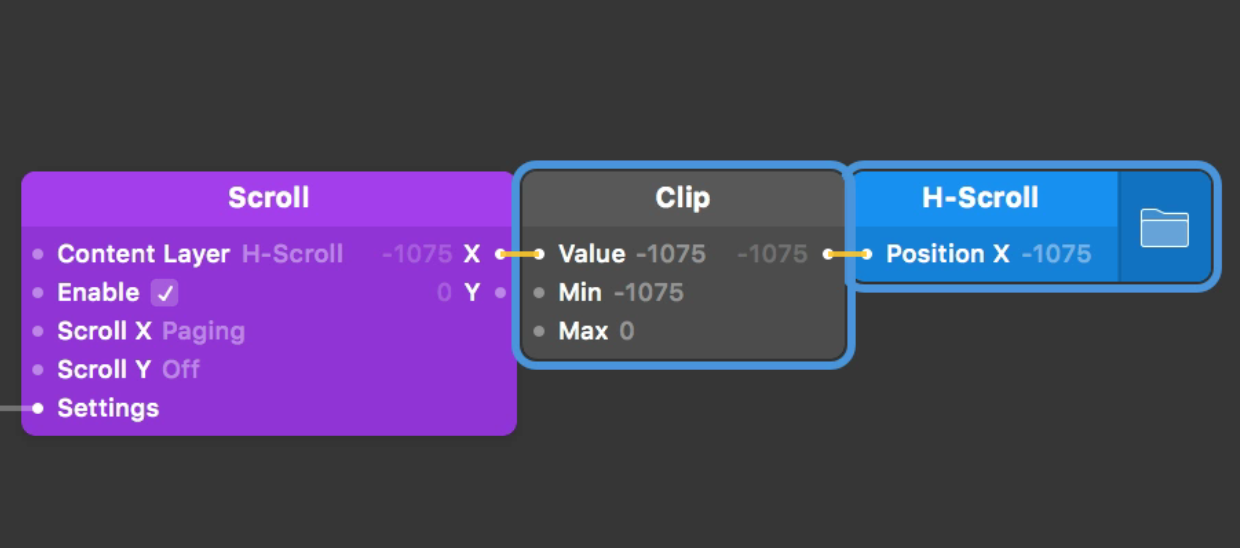
Once this is done, try scrolling once again. As soon as we get to the start and end of our H-Scroll Group, it becomes clipped within the two values.