We have learnt how to use the Switch patch to transition between two states, but how do we go between more than two, such as in a Tab Bar for example?
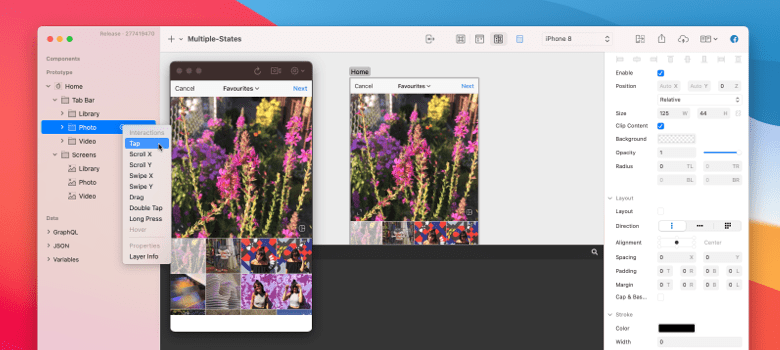
We are going to rebuild this Instagram compose modal to learn how to interact with three or more states, and learn two core patch types while doing so.
Setting up
The starting tutorial files have the basics already set up. Our Layers panel contains a Group named Screens, containing our three compose options (Library, Photo, Video). Our Layers panel also contains a Tab Bar Group, with a tab corresponding to each screen.
Usually we would use a Switch patch to switch between states. A Switch patch however only supports two states. That means we could only switch back-and-forth two tabs.
We have three tabs to switch between in this prototype, so we need to take slightly different approach.
Switching between options
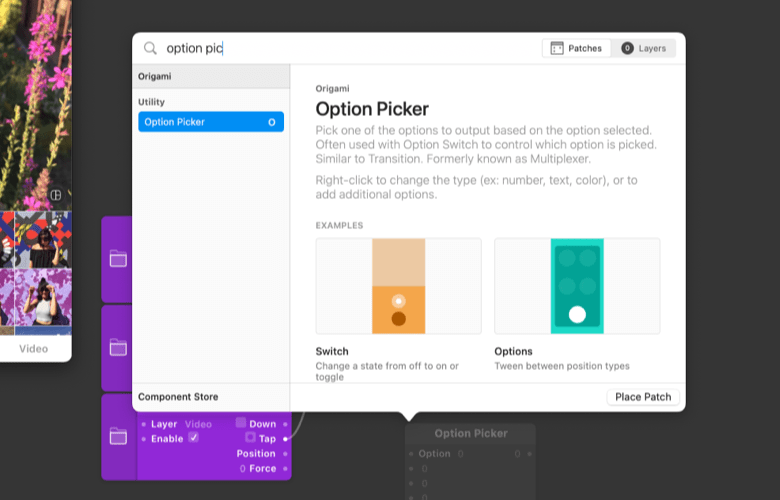
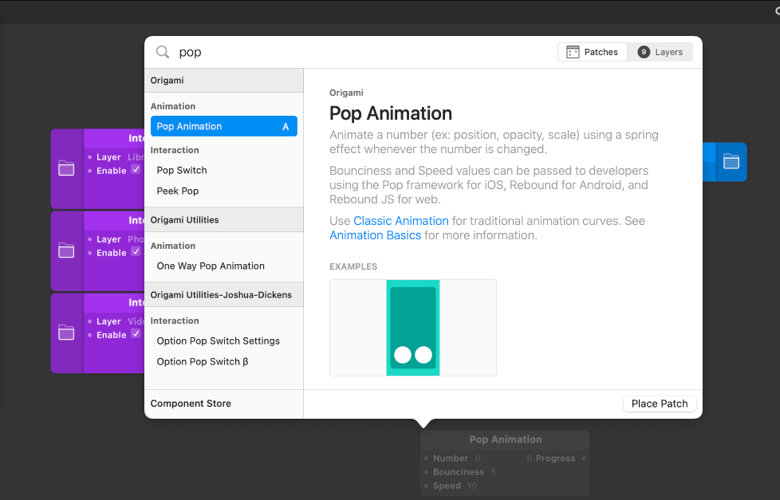
Insert an Option Switch patch by double-clicking on the Patch Editor, typing to find Option Switch, and then pressing Return ⏎. An Option Switch patch supports as many inputs as we need, and lets us use interactions to change between these options.
We know that the three different options we need to switch between in the Tab Bar Group are Library, Photo, and Video. We need to detect interaction on each of these.
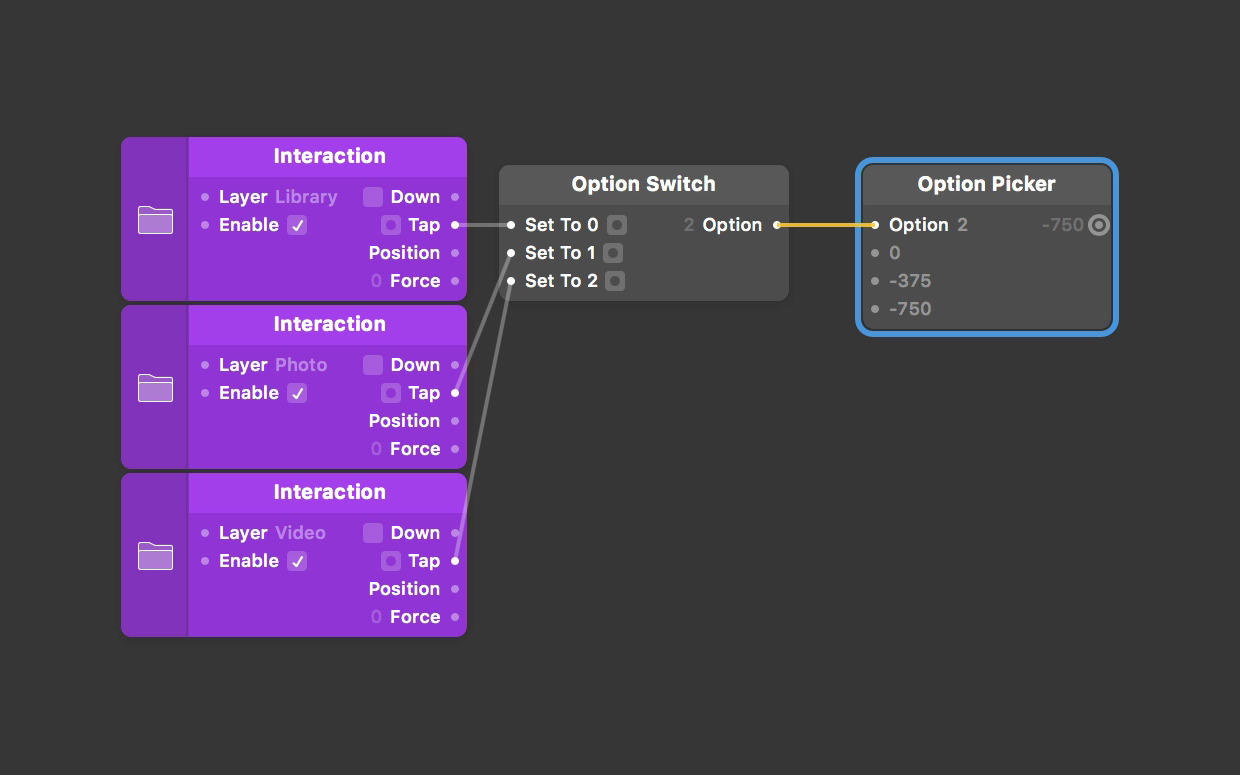
Hover over the Library Group in the Layers panel, click Touch, and then Tap. Connect the Tap output of the newly-created Interaction patch to the first input of the Option Switch patch. Repeat this process for the Photo and Video Group layers, connecting to the following inputs in the Option Switch patch.
 patch to the next available [Option Switch](../../documentation/patches/builtin.indexSwitch.html) input.](/public/images/tutorials/multiple-states/option-switch-patch.png)
Tapping on any of the three Tab Bar items in the prototype is detected by its respective Interaction patch, and then passed to the Option Switch. The corresponding option in the Option Switch patch becomes its output.
Zero-based numbering
Options in the Option Switch patch (and also indexes elsewhere in Origami) count up from 0. Our first option is 0, the second is 1, the third is 2, and so on if we had more.
Picking options
Now that we can switch between options and have them pass through as the output of our Option Switch, how do we act on that? Add an Option Picker patch to our Patch Editor by double-clicking on the Patch Editor, typing to find Option Picker, and then pressing Return ⏎.
Connecting switches to options
You can now connect the Option Switch patch output to the Option input of the Option Picker.
.](/public/images/tutorials/multiple-states/option-picker-patch.png)
Right-click on the Option Picker to change the number of inputs to match the amount in the Option Switch patch. We have 3 inputs, since we are interacting with 3 tabs.
Applying states
Our first screen has a Position X of 0. Enter a 0 value for our first option in the Option Picker patch. Our second screen has an X value of -375, and our third screen has an X value of -750. Enter these values into the Option Picker patch.
 patch and its values should match this.](/public/images/tutorials/multiple-states/option-picker-values.png)
Tap on any of the three Tab Bar labels in the prototype. You should see the Interaction be detected, passing to the Option Switch patch, and then changing the Option Picker patch output.
The Option Picker receives which Option we’ve last switched to, and finds the corresponding input in its inputs. The corresponding input value is outputted.
For example, if the Photo tab is currently selected, we are at the second input. That corresponds to Set to 1, or Option 1. The Option Picker will look for index 1 (the second, after index 0), and output that value. In this case, -375.
Connect the output of Option Picker to the Position X property of Screens.
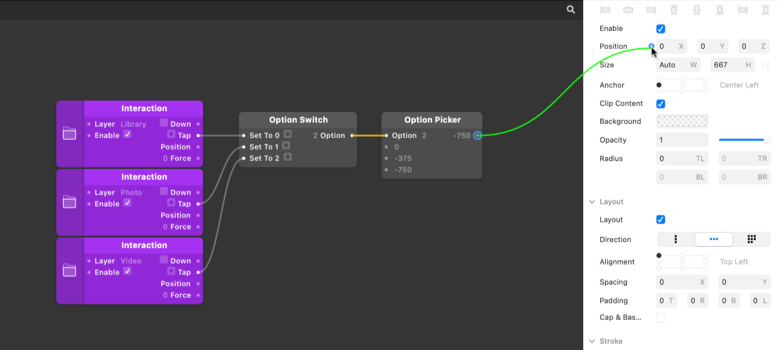
Tapping on any of the three tabs in the Viewer should switch Screens X Position accordingly.
Tying it together with animation
These transitions are currently instantaneous. To animate between these transitions, we can use a Pop Animation patch. Double-click on the Patch Editor, type to find Pop Animation, and then press Return ⏎.
Insert the Pop Animation patch between the Option Picker patch and Layer Property patch. Then connect the Option Picker output to the Number input of the Pop Animation, and the Progress output of the Pop Animation to the Screens Position X Layer Property patch.
Edit the Bounciness and Speed values to your liking, and interact with the results of your handiwork in the Viewer.
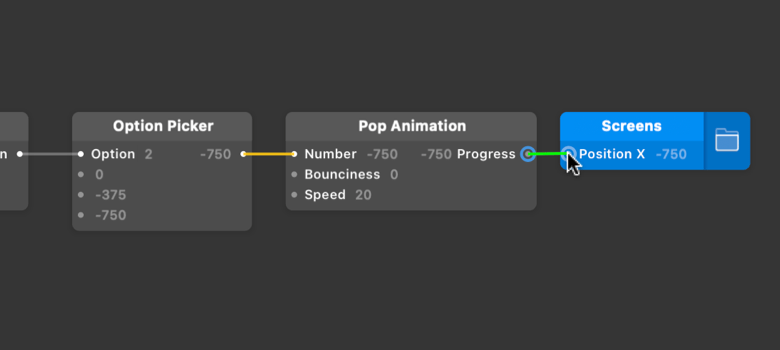
0 and Speed value of 20 in this case.
Extending Option Picker
Option Picker supports many different types of data including colors, positions, booleans, and images. This allows great flexibility when it comes to creating prototypes with multiple states, beyond numbers for positioning.