Scrolling views are easy to build in Origami and highly flexible too. We’re going to learn how to use scroll by creating a basic Messenger prototype. Make sure you download the tutorial files to follow along.
Setting up
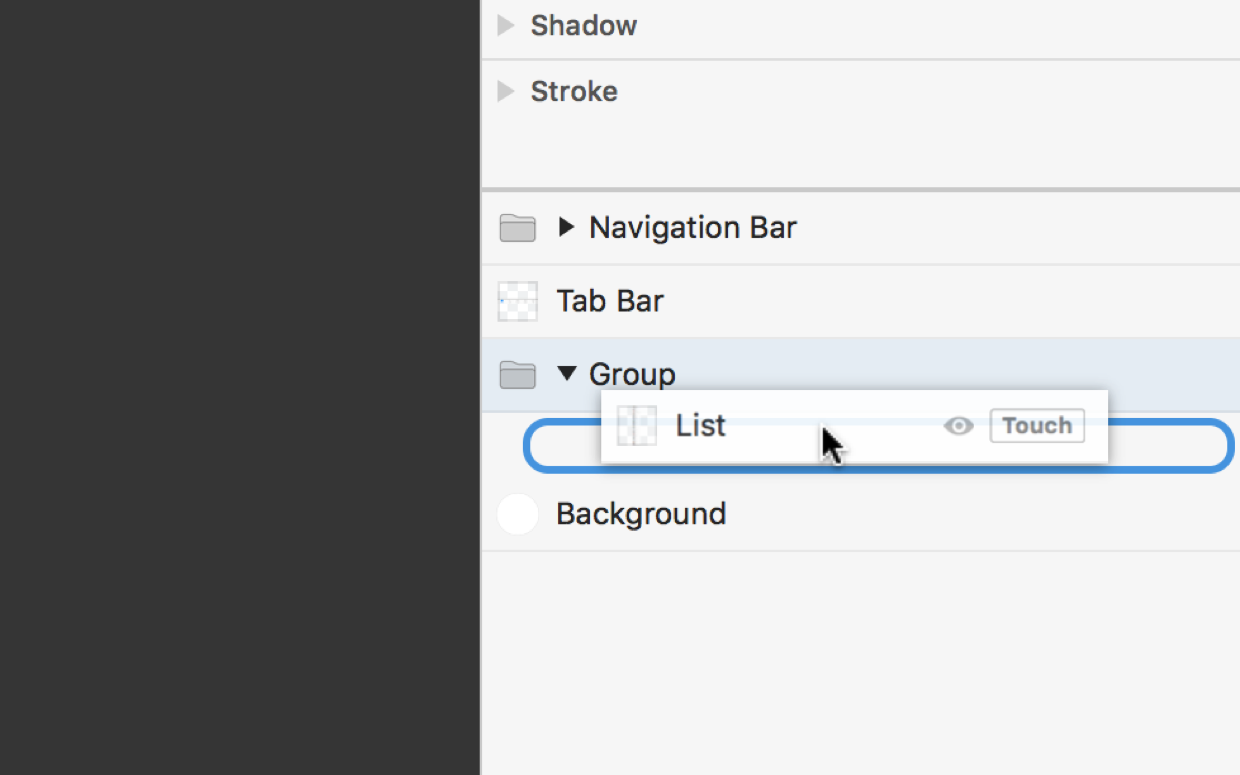
Once you have the tutorial files open, you might notice that we have a layer named List set up below the Navigation Bar and the Tab Bar in our Layers panel. Take note of how the List layer is anchored to the top, and positioned exactly below the Navigation Bar.
Adding scroll interaction
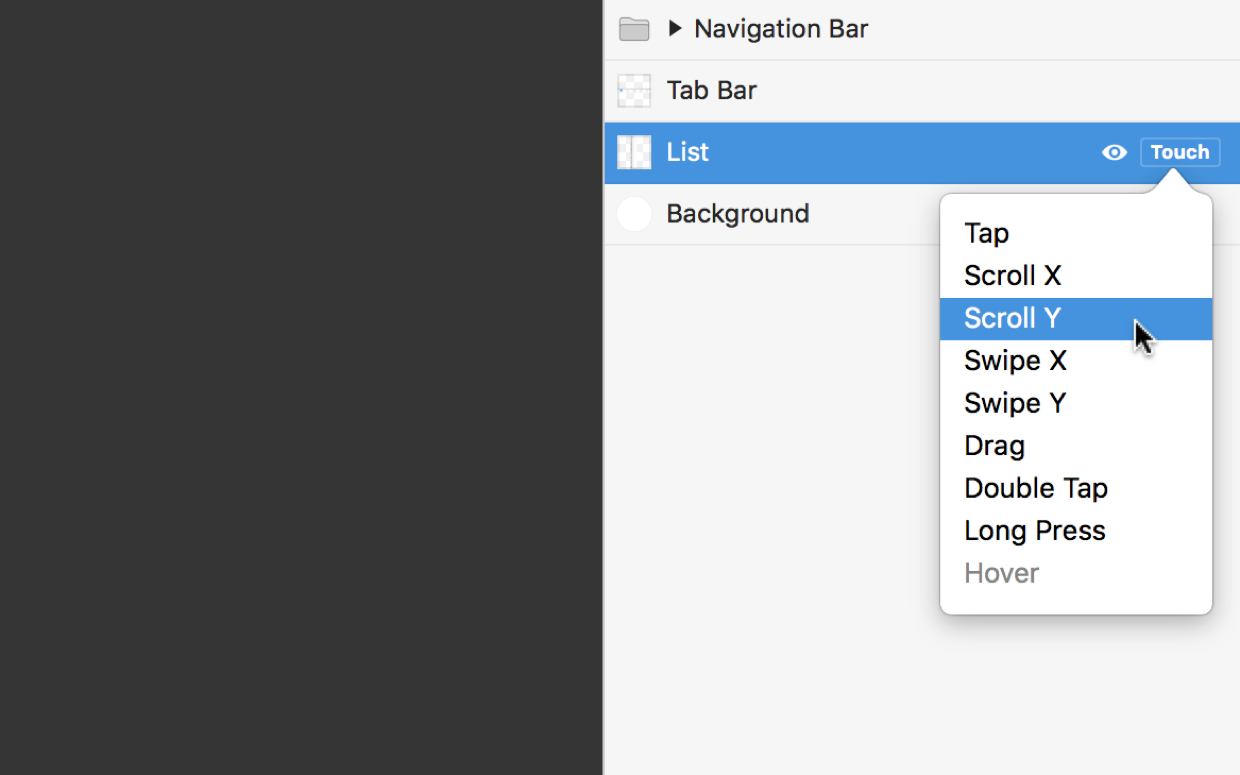
We can add Scroll to our layer just like any other type of interaction. Hover over the List layer, click the Touch button, and since we want vertical scrolling, select Scroll Y from the menu.
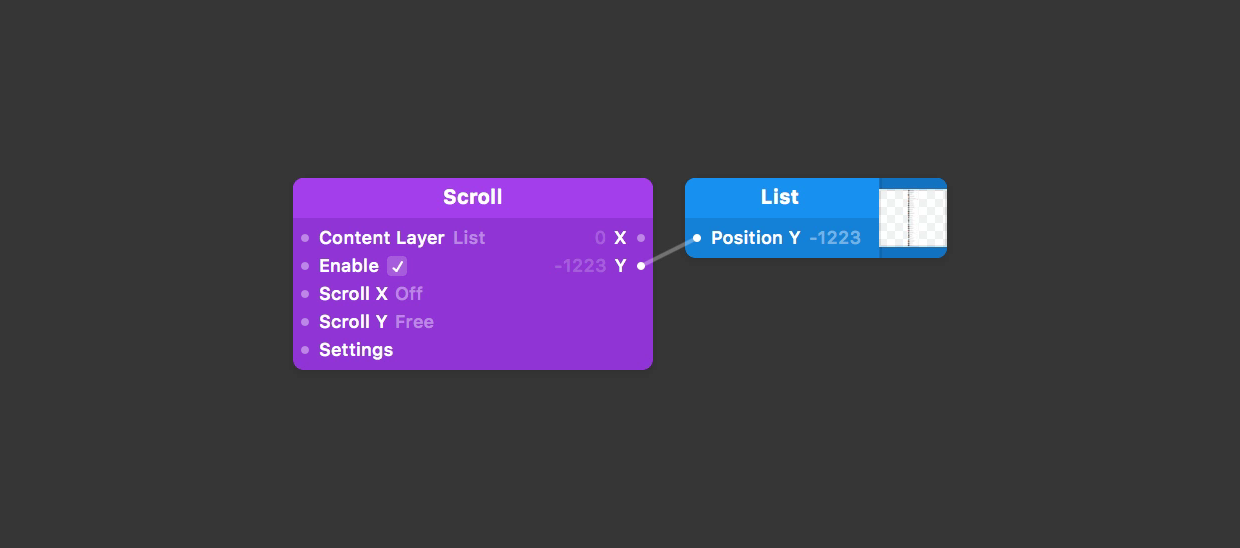
Our List layer is now scrollable with all the behaviors you would expect from something scrollable — things like velocity and rubber banding etc.
Containing a scroll
You might have noticed that adding Scroll interaction to the layer reset its position to 0, clipping the Navigation Bar from view. Hide the Navigation Bar layer to see the List layer is now positioned at the top of the screen, rather than below the Navigation Bar as intended.
Another issue is at the very bottom of the scroll. The prototype is not taking into account that our Tab Bar is in the way. This Scroll should be contained above the Tab Bar.
We need to contain our List view Scroll to the space between the Navigation Bar and the above the Tab Bar. We can do this with a Group layer.
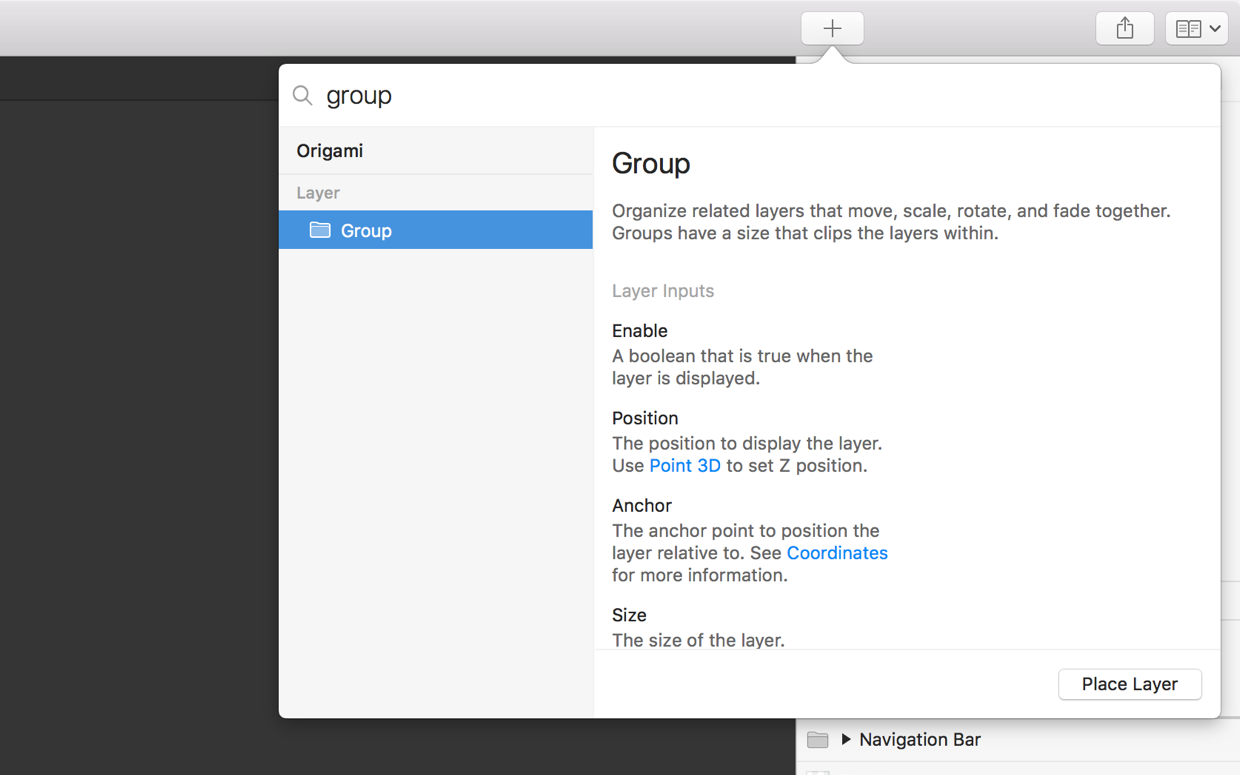
Add a Group by clicking on the New Layer button ⇧⌘N, and selecting Group. Make sure the Group is placed below the Navigation Bar and Tab Bar layers.
Visual alignment
It can be useful to temporarily add a Color Fill to a new Group layer, just to see how much space it is occupying. Add in a Color Fill layer by clicking on the New Layer button ⇧⌘N, and adding in a Color Fill. Move your Color Fill layer into Group.
 have no visible state (only their content), hence why [Color Fill](../../documentation/patches/builtin.layer.fill.html) is going to sit in [Group](../../documentation/patches/builtin.layer.layer.html) temporarily.](/public/images/tutorials/scrolling-views/color-fill.png)
Re-enable the Navigation Bar for the remaining steps.
Adjusting our container
The layer size of Group is the same size as the device screen by default. The screen width is fine in the case, as our List content fits within it. Our height however needs some tweaking.
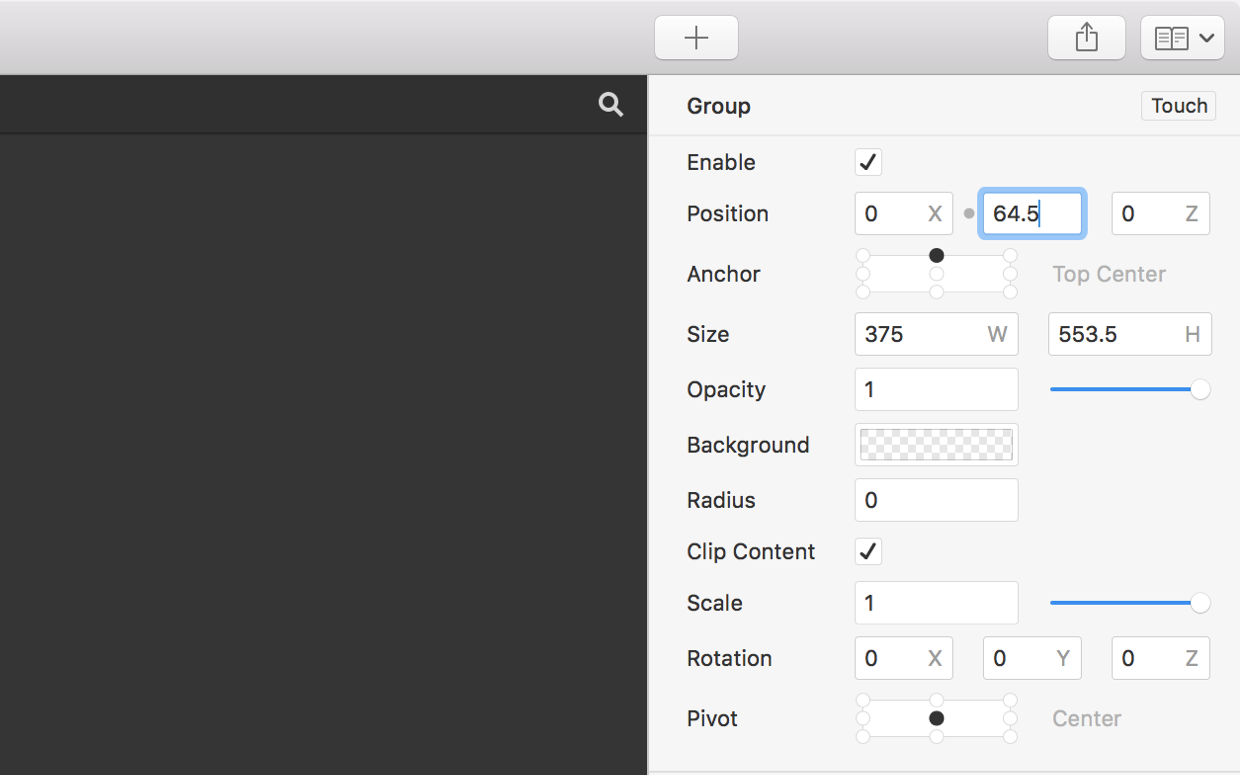
The height we wish to achieve is equivalent to the device screen height minus the height of the Navigation Bar layer, 64.5, minus the height of the Tab Bar layer, 49.
Select the Group layer. In the Size H property inside the Layers panel, enter 667-49-64.5 and hit Return ⏎.
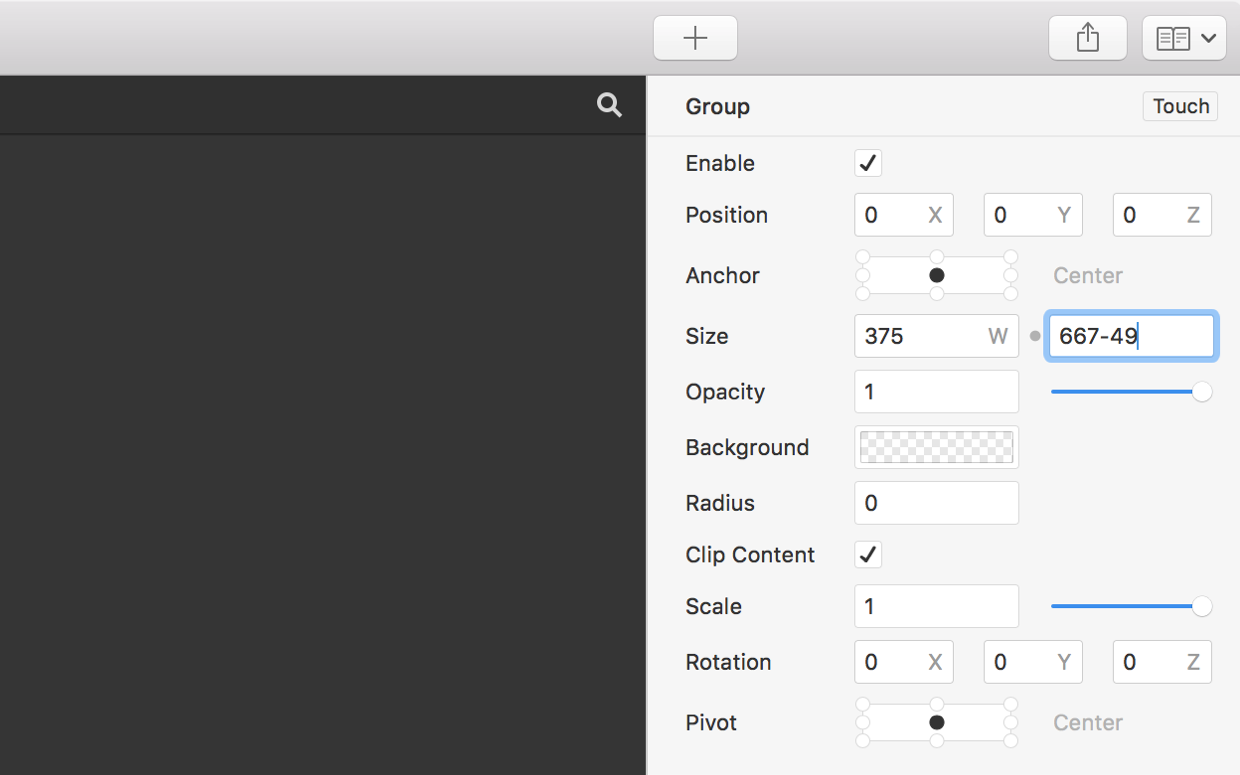
553.5 appear.
Aligning our container
In in the Viewer you should see that the List (underneath our Color Fill) is not perfectly aligned with our new height values. This is because our Group is still anchored to the center of the screen.
Change the Anchor of our Group to the top of the screen. Then change the Group Y position to the height of the Navigation Bar, which was 64.5. You should then see that our Group (and Color Fill) are now perfectly aligned in our prototype.
Ordering the container
Now that the Group is correctly placed, we can delete our temporary Color Fill, and drag our layer List inside the Group.
You can now give the prototype a spin in the Viewer. Notice how List is now neatly constrained between the top Navigation Bar and the bottom Tab Bar.