Change the layout of a photo viewer prototype, depending on whether the device is being viewed in a portrait or landscape position.
We will walkthrough the Interface Orientation patch to setup our project to function in multiple orientations, use the Device Info patch to detect the current orientation and change the layout to best suit both portrait and landscape layouts.
Download the tutorial starter file to follow along as we rebuild this prototype.
Using device orientation
The starting tutorial file already has layers and patches in place to create a photo viewer screen. By tapping the background, we can enter a photo lightbox by hiding the navigation bar and changing the background color.
We also want to let the photo viewer be used in a landscape position, which will fit the photo to the full width to the screen and automatically enter the lightbox view.
Rotating the viewer
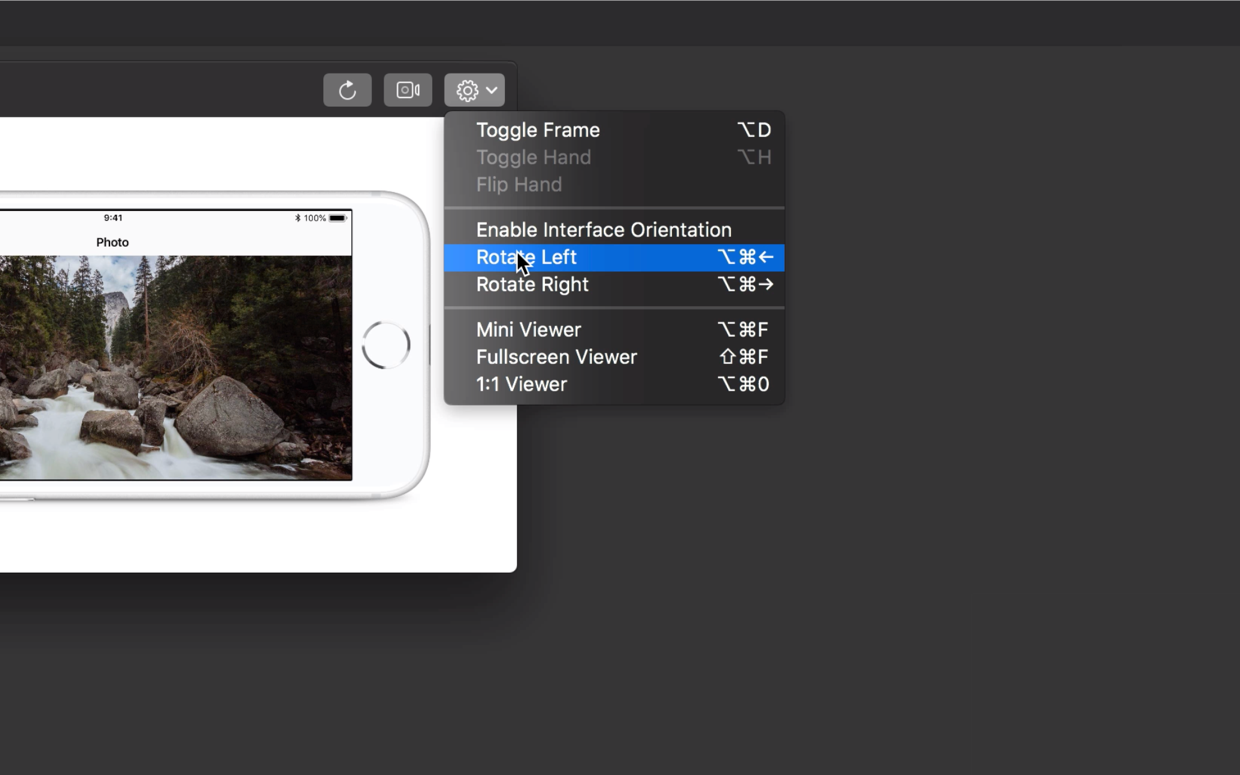
In Origami Studio we can rotate the viewer to simulate rotating the device the prototype will be running on. To do this, click on the Settings button on the viewer toolbar and select Rotate Right ⌘⌥→
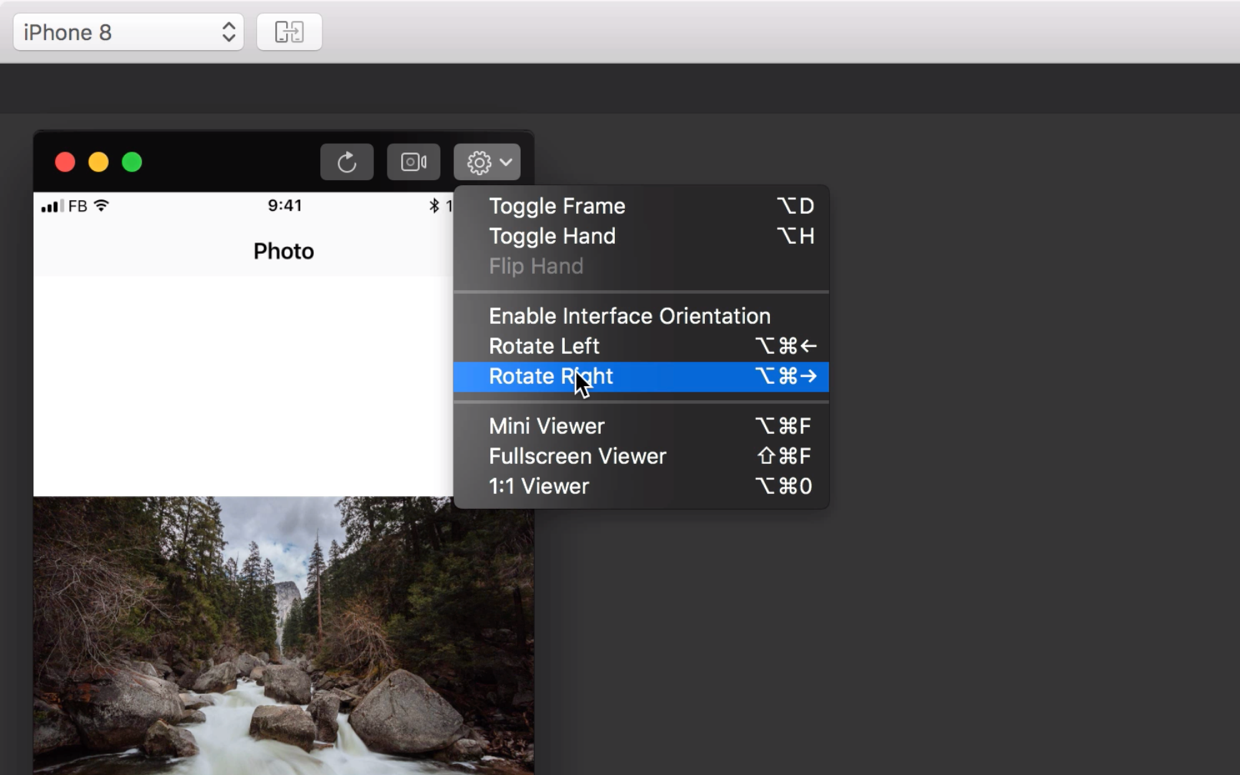
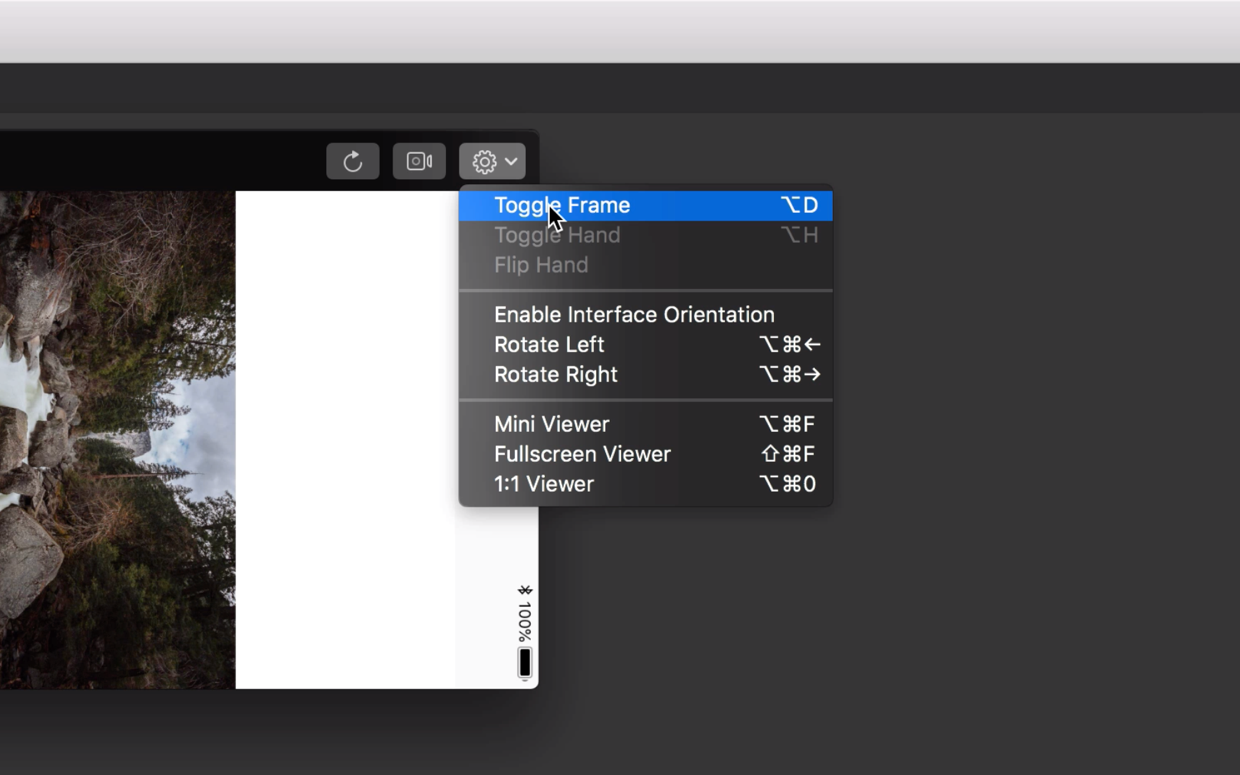
Now we can see how our prototype looks when the device is held in a landscape position. To help visualize this, we can display the device frame in the viewer by clicking on the settings button on the viewer toolbar and selecting Toggle Frame ⌥D.
Even though we have rotated the device, the prototype interface has not rotated into a landscape mode. This is because we haven’t enabled interface orientation yet.
Enabling interface orientation
To choose the orientations we want our prototype to display in, we need to enable Interface Orientation. By default, Origami prototypes are locked in the portrait orientation until we do this.
Click on the Viewer Toolbar and select Enable Interface Orientation. This will add an Interface Orientation patch to the patch editor.
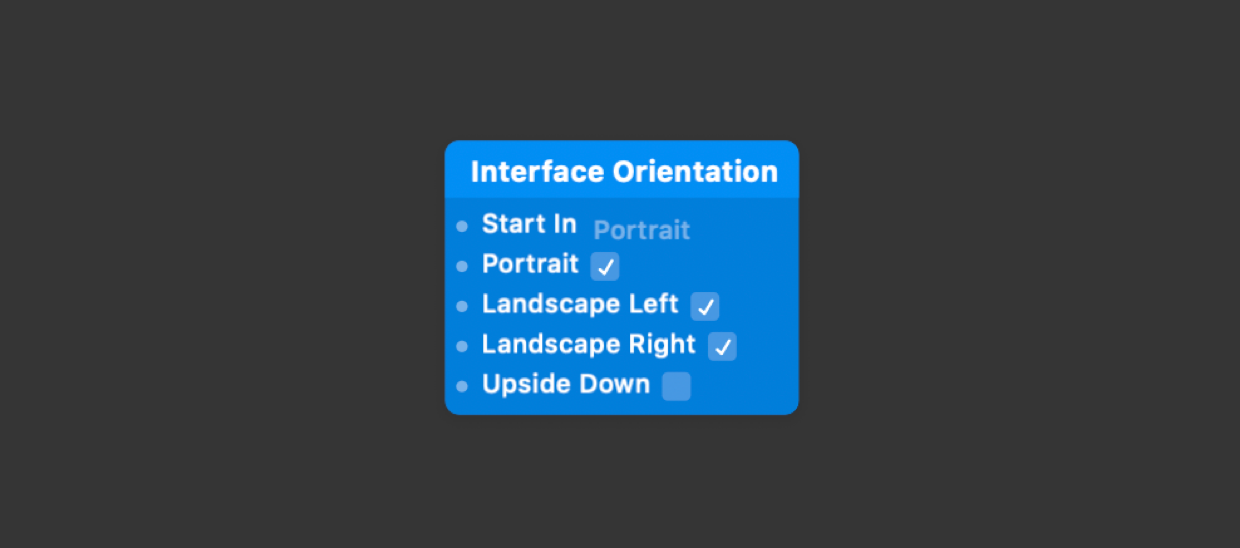
There are four orientations we can enable: Portrait, Landscape Left, Landscape Right and Upside Down. We want the photo viewer to work in portrait and both landscape orientations, so we can leave the default options as they are.
We can also choose the starting orientation for the prototype, let’s leave this as Portrait.
Let’s rotate the device again ⌘⌥→ Now the prototype interface rotates with the device.
Making layers responsive
Next we need to make our photo and navigation bar layers responsive so they look right in both portrait and landscape positions.
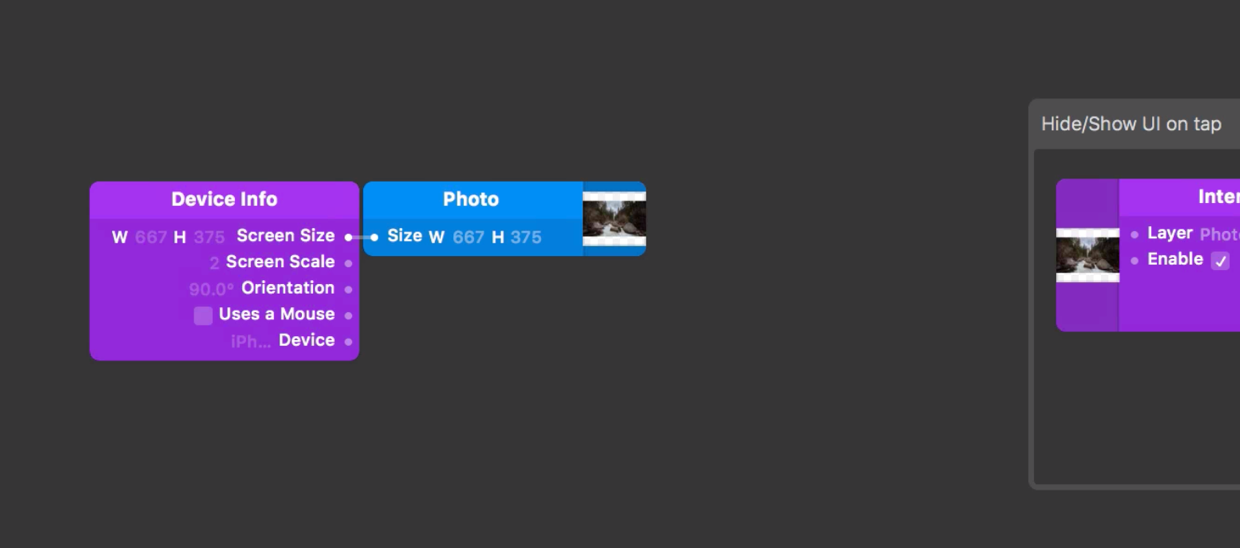
We want the photo layer to fit the screen, so we need the screen size value. When is enabled any rotation to the device rotates the interface as well and therefore the screen size is rotated too.
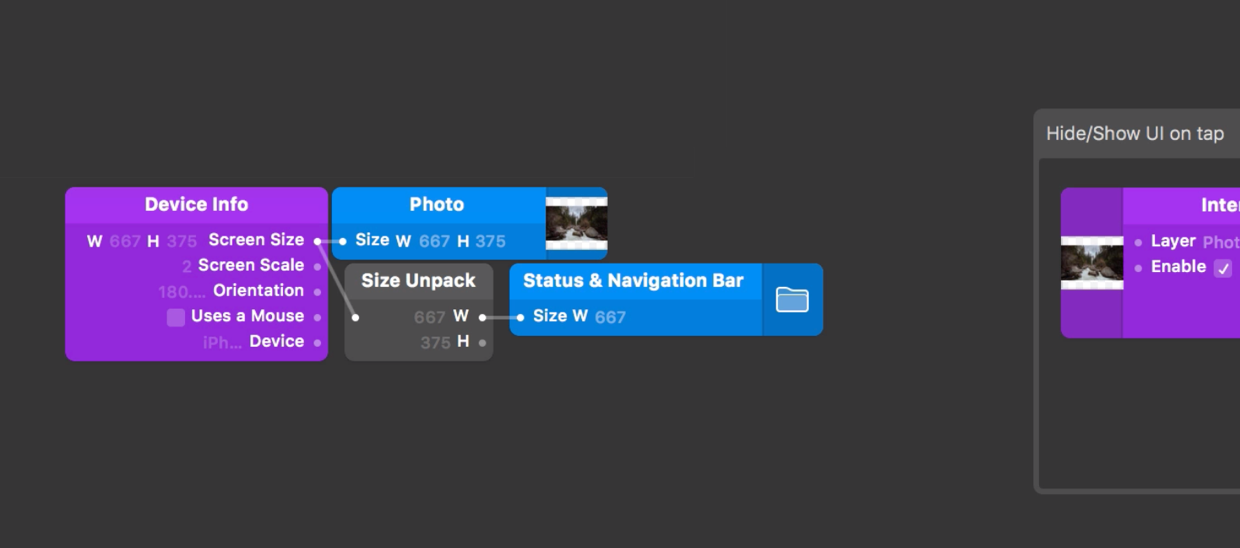
Insert a Device Info patch to the patch editor. Select the Photo layer in the layer list and connect the Screen Size output on the Device Info patch to the Size input on our Photo layer in the Layer Inspector.
For the Navigation Bar and Status Bar we only want to make the width responsive. To get the device width from the Device Info patch, we need to use the Size Unpack patch which separates the two dimensional size value into two independent values for width and height.
Insert a Size Unpack patch to the patch editor. Connect the Screen Size output from the Device Info patch to the input on the Size Unpack patch. Select the Status & Navigation Bar group in the Layer List and connect the Width output from the Size Unpack patch to the Width input on the Status & Navigation Bar group in the Layer Inspector.
Rotate the viewer to see the interface rotate and the layers resize responsively. You will notice when the device is upside down, which is not enabled on the patch, the interface remains in the previous orientation.
Detecting the current orientation
In the starting file, tapping on the photo flips a Switch patch between the On and Off states. We also want to turn on this Switch patch when the device is in a landscape position and turn it back off when it is in a portrait position.
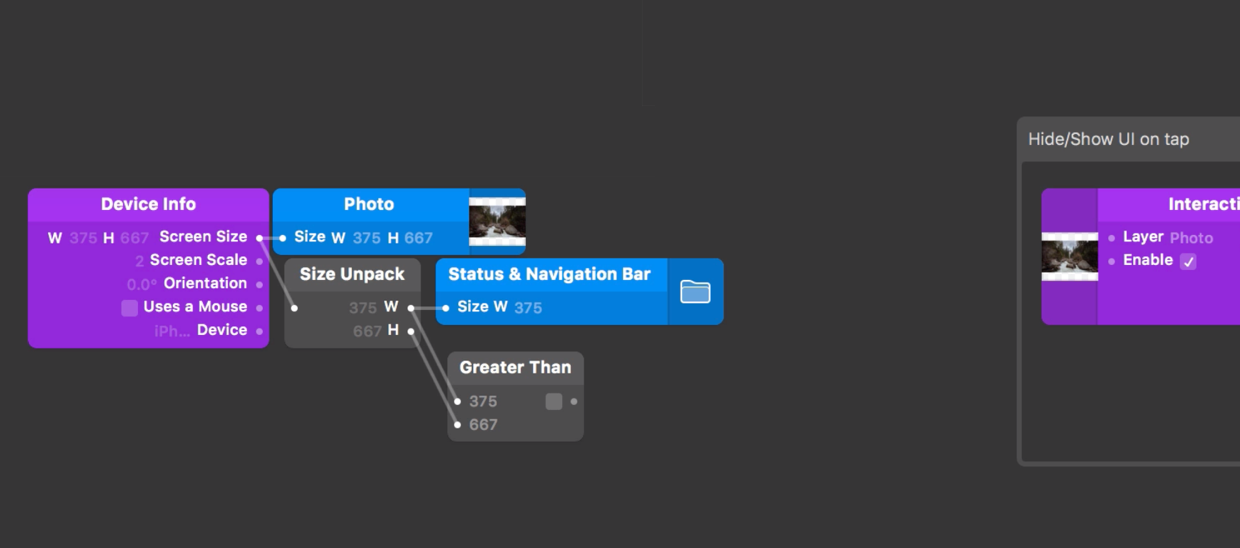
When the device is in a landscape position, its width is greater than its height. Therefore we can use the Screen Size output from the Device Info patch to detect whether we are in a landscape orientation.
Insert a Greater Than patch to the patch editor. Connect the Width output from the Size Unpack patch to the first input on the Greater Than patch. Connect the Height output from the Size Unpack patch to the second input on the Greater Than patch.
Now when we rotate our device into a landscape position, the Greater Than patch is On. However, the Turn On and Off inputs on our Switch are pulses. To convert an On/Off state to On and Off pulses, we need to use the Pulse patch. Insert a Pulse patch to the patch editor. Connect the output from the Greater Than patch to the On/Off input on the Pulse patch. Connect the Turned On output from the Pulse patch to the Turn On input on the Switch patch and likewise, connect the Turned Off output from the Pulse patch to the Turn Off input on the Switch patch.

Wrapping Up
And that’s it! We have setup our prototype to work in multiple orientations, made it responsive to look great in both portrait and landscape positions and added a nice animation when we rotate.
Export this project to Origami Live and see how it works when you rotate your external device. If you haven’t already been through Previewing and Sharing, this tutorial will help you export the prototype to your mobile device.