Creating an Origami System
Create and share a library of layer and patch components with your team and keep everyone up to date by using an Origami System.
In this tutorial, we’ll walk through the steps to create an Origami System and how to publish the system and share it with others.
If you haven’t already, review the Create a Component tutorial before starting this one. Download the tutorial starter assets to follow along as we build an Origami System.
The Original System Maker
Previously, when you wanted to create an Origami System, you would first create a System Maker. From there, you would add Origami files that would contain document components that you wished to add to your System.
While this worked fine, there were a few shortcomings of the System Maker. It made it possible to have multiple versions of the same component within the system. Which could either lead to conflicts that would not allow the System to be published, or mismatching components between files. Added, with the original System Maker, you would have to manage numerous Origami files. This ended up making building and maintaining a System Library a tedious affair.
The New Origami System Workflow
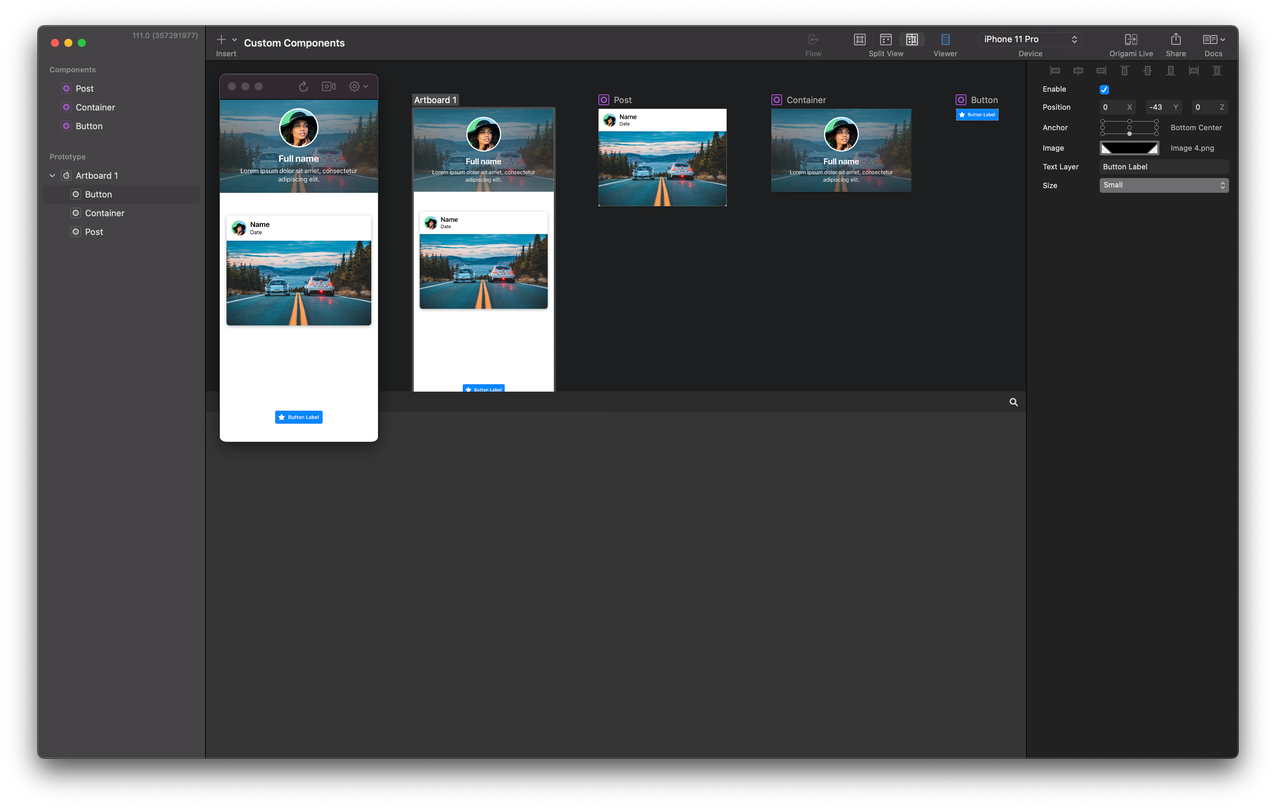
While a System Maker no longer exists in Origami (Origami still supports legacy System Maker files, but no longer offers the ability to create a new one), creating a Origami System couldn’t be easier. An important note moving forward, the new/current workflow for building an Origami System requires that all of the Components be saved in a single Origami file. This is much different from the past which allowed multiple Origami files to be used to build a System. For this lesson, we’ll first start from scratch. Let’s start by opening Origami Studio, create a new Origami file and save. We’ll name the file Custom Components. In the Starting package folder, open up all three Origami files (Button, Post, and Profile). Then copy and paste each document component into our Custom Components file.
With at least one component in our file, a new option appears under the Component tab in the menu bar.
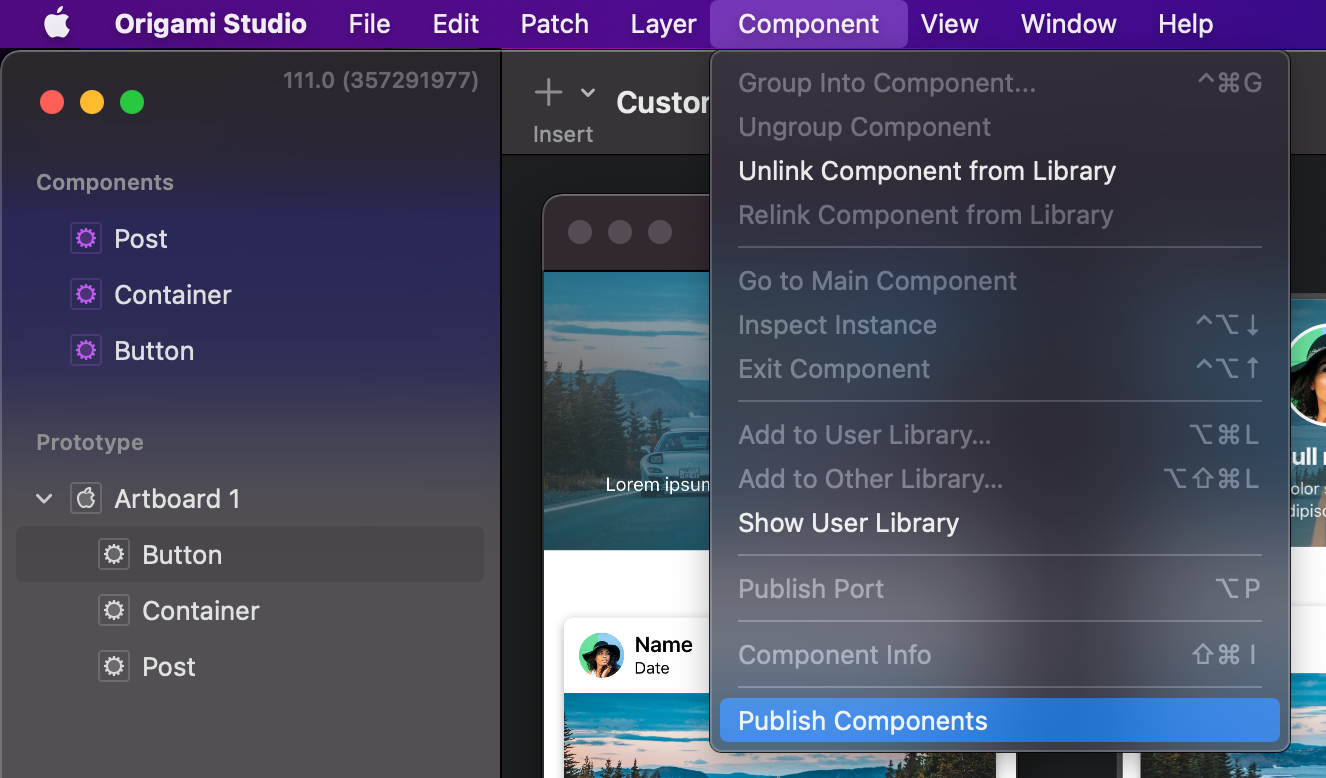
Click on Publish Components to open the System Publisher. A new popover appears and here is where you’ll manage what gets and does not get published. This will include all Document Components and Patch Components in your Origami File. Also, you can enter any information about each component, similar to the Component Info window.
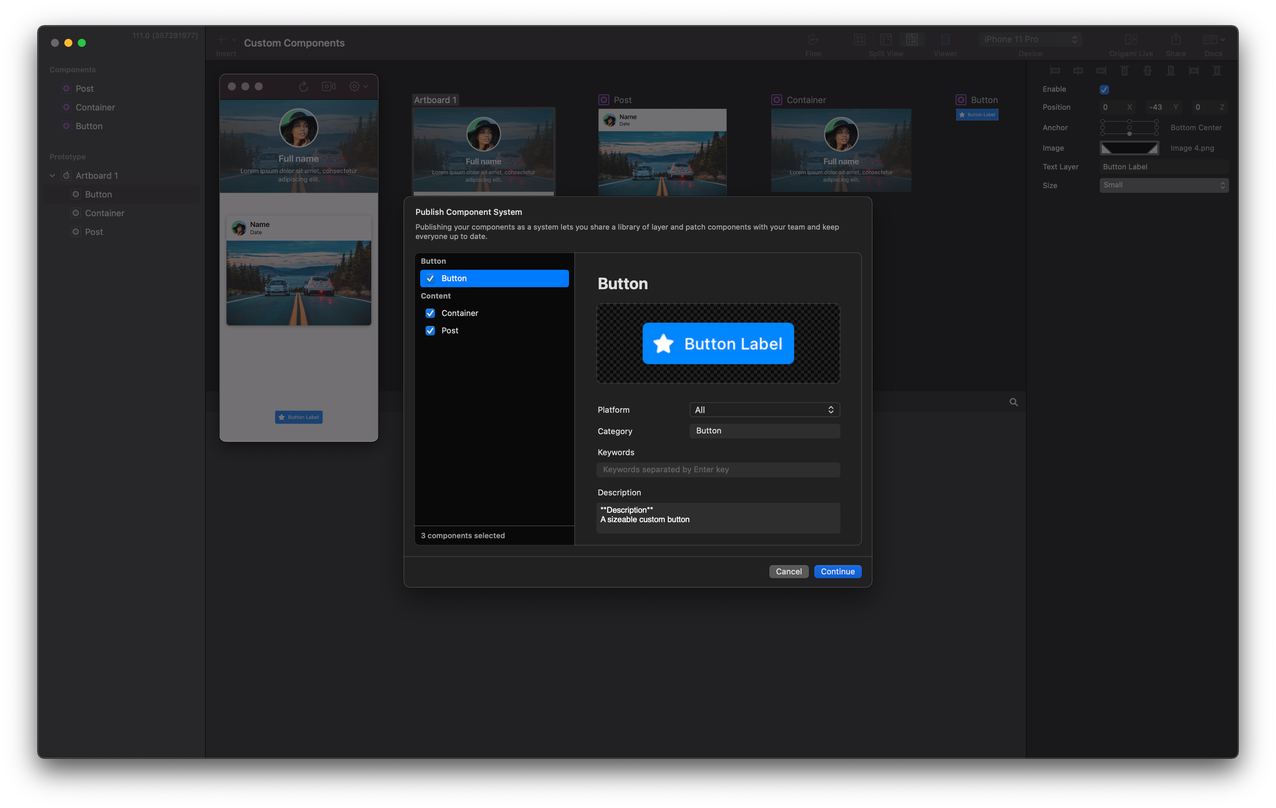
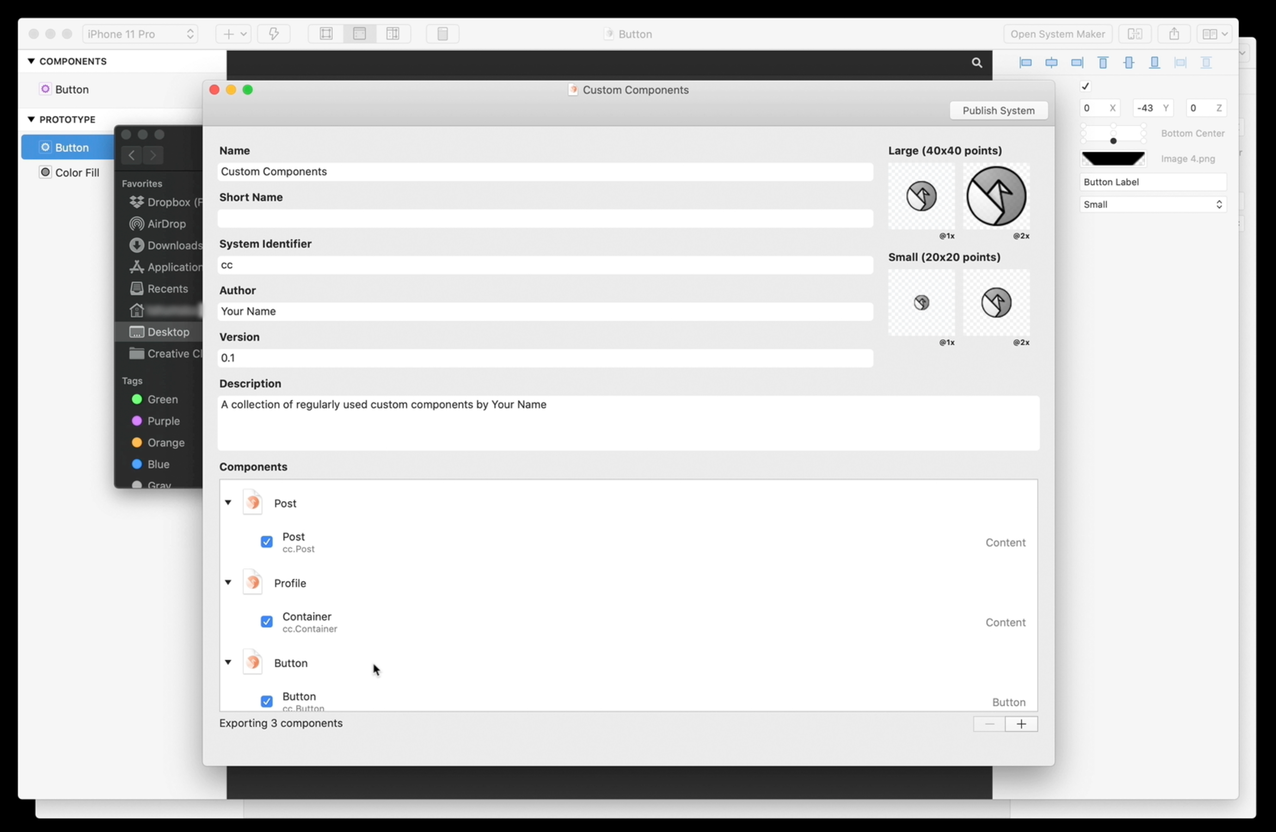
Once you are satisfied with what component(s) are being included and the information for each component is correct, proceed to hit the Continue button. From here, a new window will appear. This is where you’ll enter all of the information about your Component Library.
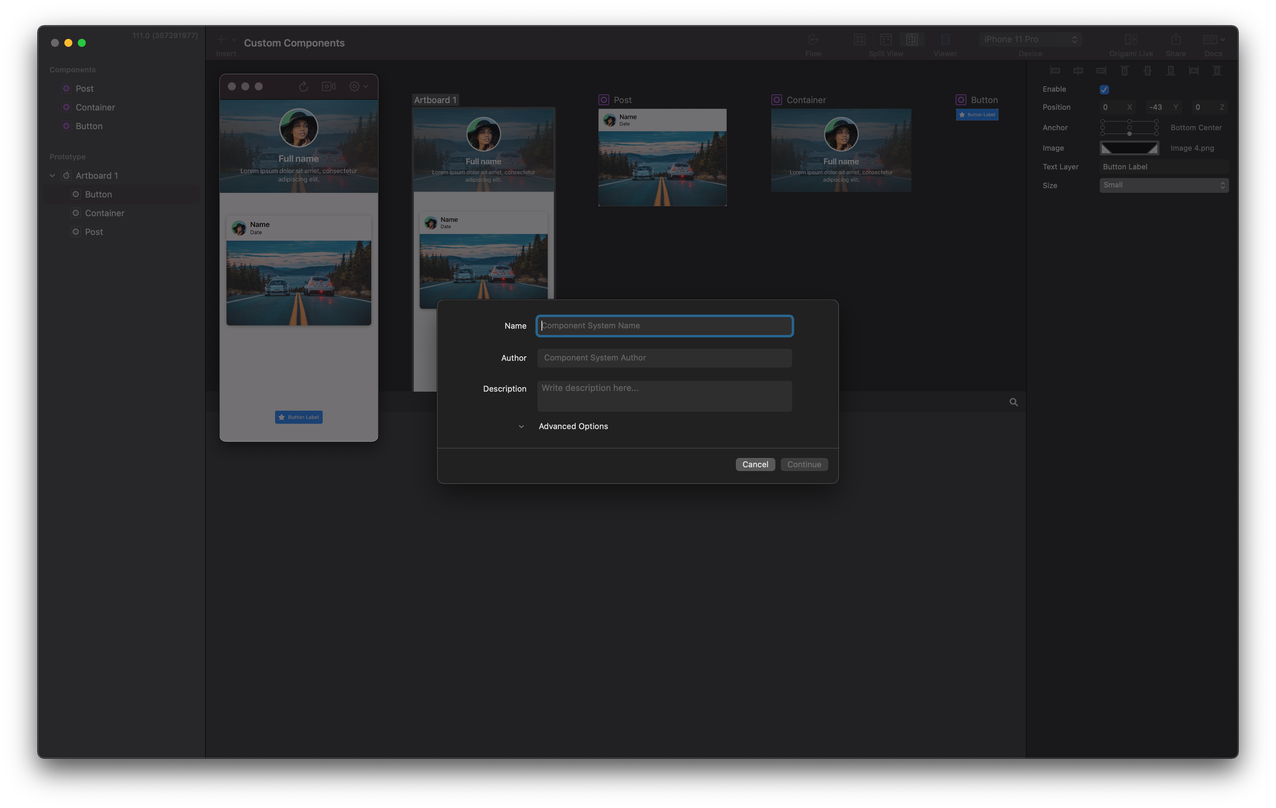
The first line is where you’ll enter the Name of your System, so for here, we’ll type in Custom Components. The second line is where you’ll enter your name or the name of the org that will be managing the Library. The last field is where you can enter a brief description about the Origami System. We’ll type in “A collection of regularly used custom components by Your Name.” From here, you can also enter/edit a few additional options by clicking on the Advanced Options tab.
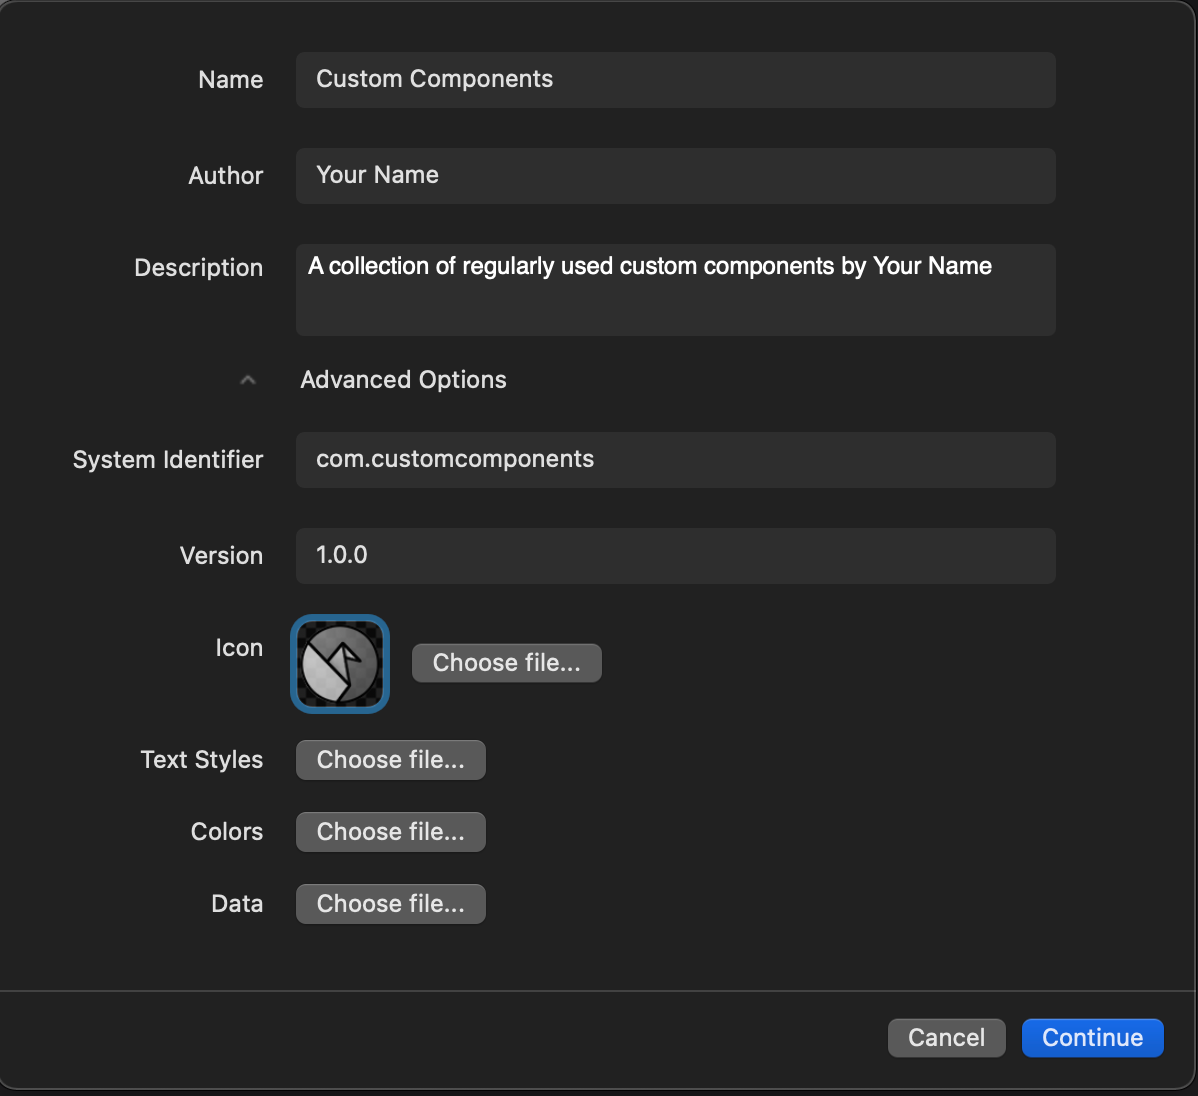
The Advanced Options allows you to modify/tailor the System Identifier, set the versioning of the System and set a display Icon that will be displayed next to any component that is used from your published Origami System. Here is also where you will attach any JSON files that handle text styling, color libraries, or data. Let’s add a custom icon for our System. In the Starting folder, there is an image file called “[email protected]”. Simply click on the image in your Finder and drag and drop it over the image field.
Once all of the fields are filled, hit the Continue button and you will be taken to a finder window to set where you wish to have your published library saved. You can change the name of the system if you wish, by default the system will inherit the name you entered in the Name field in the previous window. Click on Save and you have now published an Origami System.
Loading and Sharing an Origami System
The first way to load your newly created System into Origami is by double-clicking on the exported file. This will automatically add it to Origami. The next way is to load it in directly via the Preferences pane. In the System Bar menu, Navigate to Origami Studio > Preferences. A pop-up menu will appear and from here, navigate to the Components Tab.
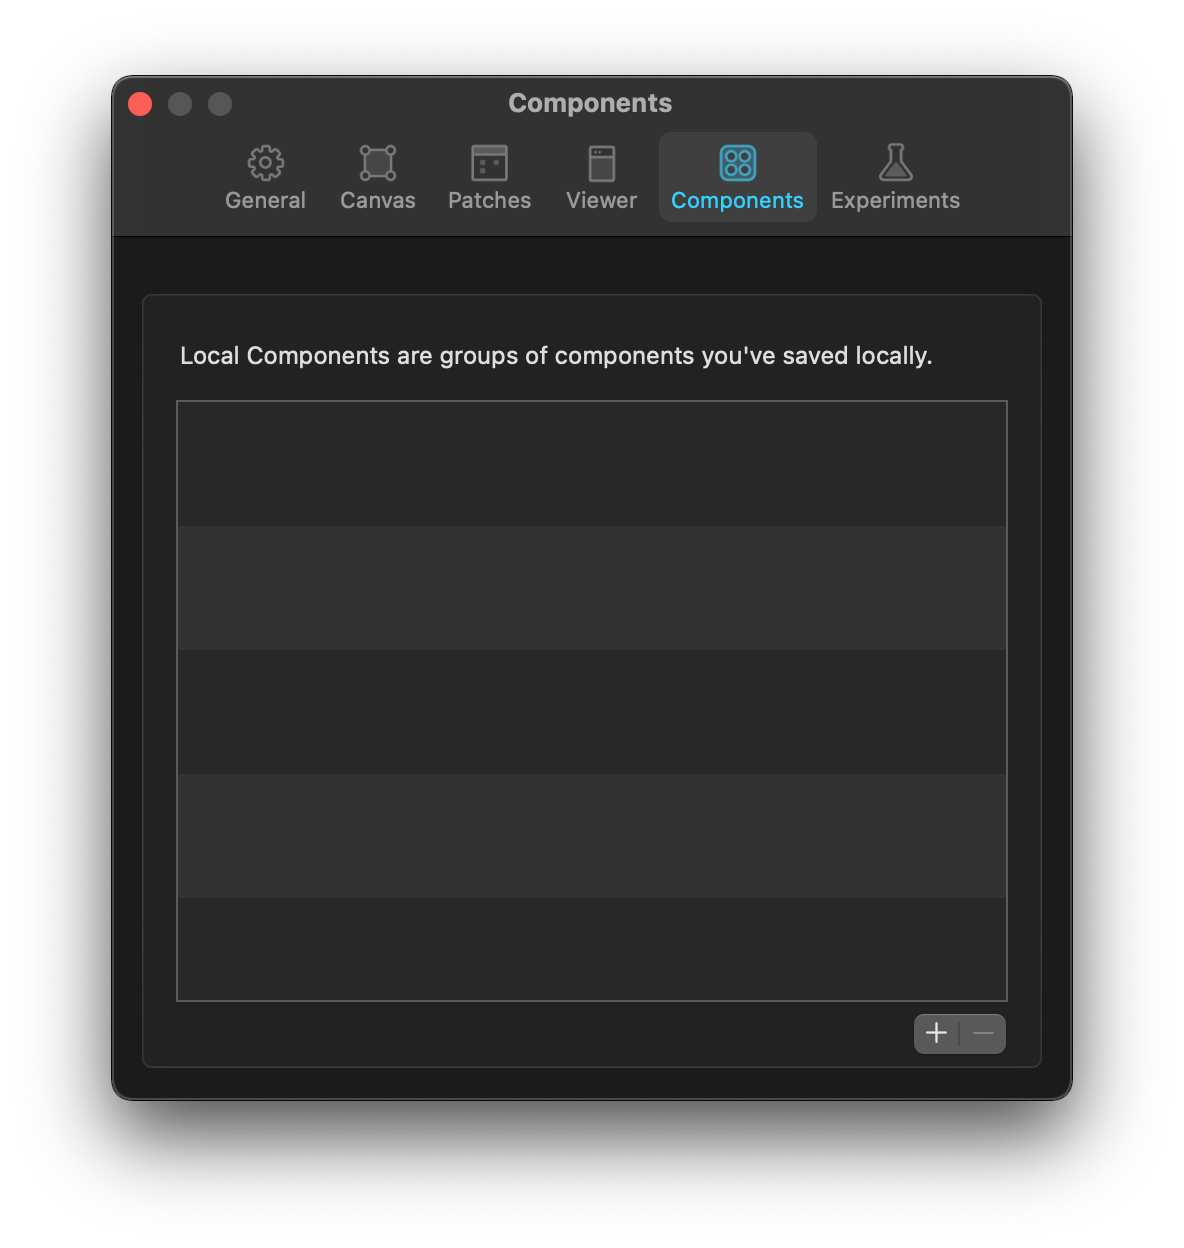
Click on the + symbol in the lower right corner, and then navigate to where the System you want to load into Origami resides. Select the file and then click Open.
If you plan on sharing the system with others, we’d recommend publishing the system on a shared folder or a file sharing service like Dropbox or Google Drive. When the system is installed from a shared location, everyone will receive updates to the system, and existing documents with older components will be prompted to upgrade.
Using components from the System
Let’s check out our newly installed component by creating a new document and adding the new system Button component.
First, quit and re-open Origami Studio to reload the libraries with our new components and open a new document.
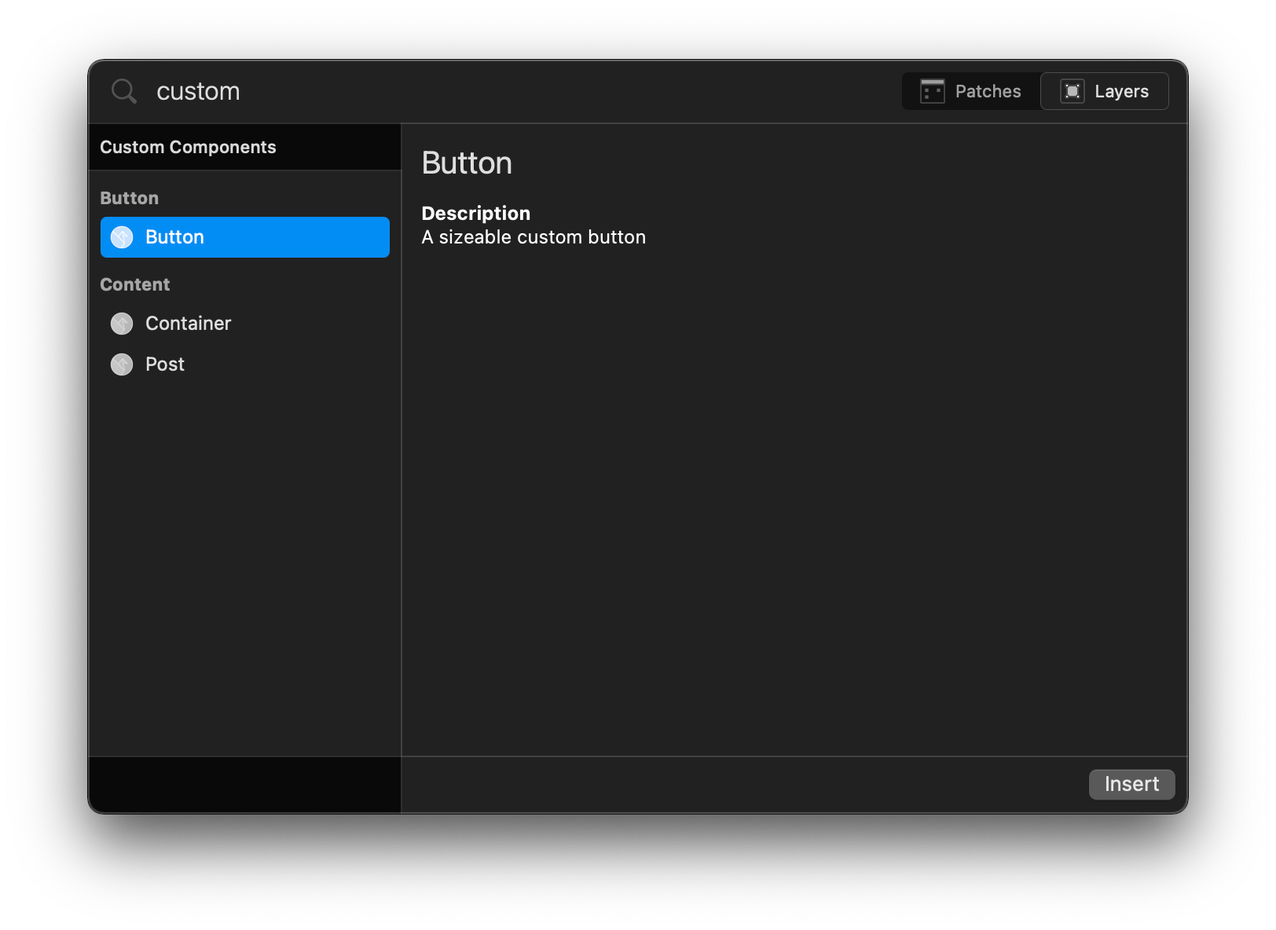
Open the layer library and type Custom Components to search for our new system components. Select the Button component and press enter to add it to the layer list.
Wrapping up
And that’s it, we have created our own System that can be easily distributed to other users. To add more components to the system, just build the new component within the same Origami file and re-publish the system.
We can also add patch components to Origami systems to distribute along with layer components. Visit the Component section in the documentation to find out more.
Migrating from System Maker to the New Publishing Flow
If you have a previously built Origami System that utilizes the old System Maker, upgrading to the new method is fairly straight-forward, but there are some caveats. If all of your layer and patch components are already in a single Origami file, you’re good to go and can go straight to Components > Publish Components and fill out the corresponding fields.
If the components are spread out through multiple files you’ll need to copy and paste the components into a single Origami file. We suggest starting with the larger components that may contain other layer and/or patch components (subcomponents). This will help mitigate any versioning issues with components and hopefully any breakage of a component. This will also help cutdown on the amount of copying and pasting you’ll need to do. Once you’ve finished copying and pasting all of the components into the new file, review all the components and double-check there are no duplicates. If there are duplicates, and the component is used in several other components, unfortunately, you’ll need to decide which is the version of the component you wish to keep. Rename the duplicate component to something that is easily identifiable (ex. Component Name (dup)), and then inspect all of the components that may contain the duplicate component(s). If the duplicate exists inside of a component, you will need to replace it with the version that you wish to keep and re-attach it to any linkage that the duplicate was attached to previously in the Patch Graph. Once the migration is complete and you are satisfied with the state of the components, proceed onto the publishing flow.